Lightroom Tip: Creating the “matte” look

You may have come across images which have a “matte” look to them, effectively reproducing the “matte print finish” look in a digital image. “Matte” effect images seem a little more tonally flat and perhaps evoke a more “vintage” feel to them. It’s easy to achieve the Matte effect in Lightroom, which is what today’s Lightroom tip is all about.
“Matte” effect images lack contrast and often do not hold any blacks in them. With this in mind, all you need to do is go to the Tone Curve Panel in Lightroom and make sure you have the Tone Curve view selected (not the view with sliders for Highlights, Lights, Shadows and Darks — if you’re not sure how to do this, check out our tip from earlier this week).
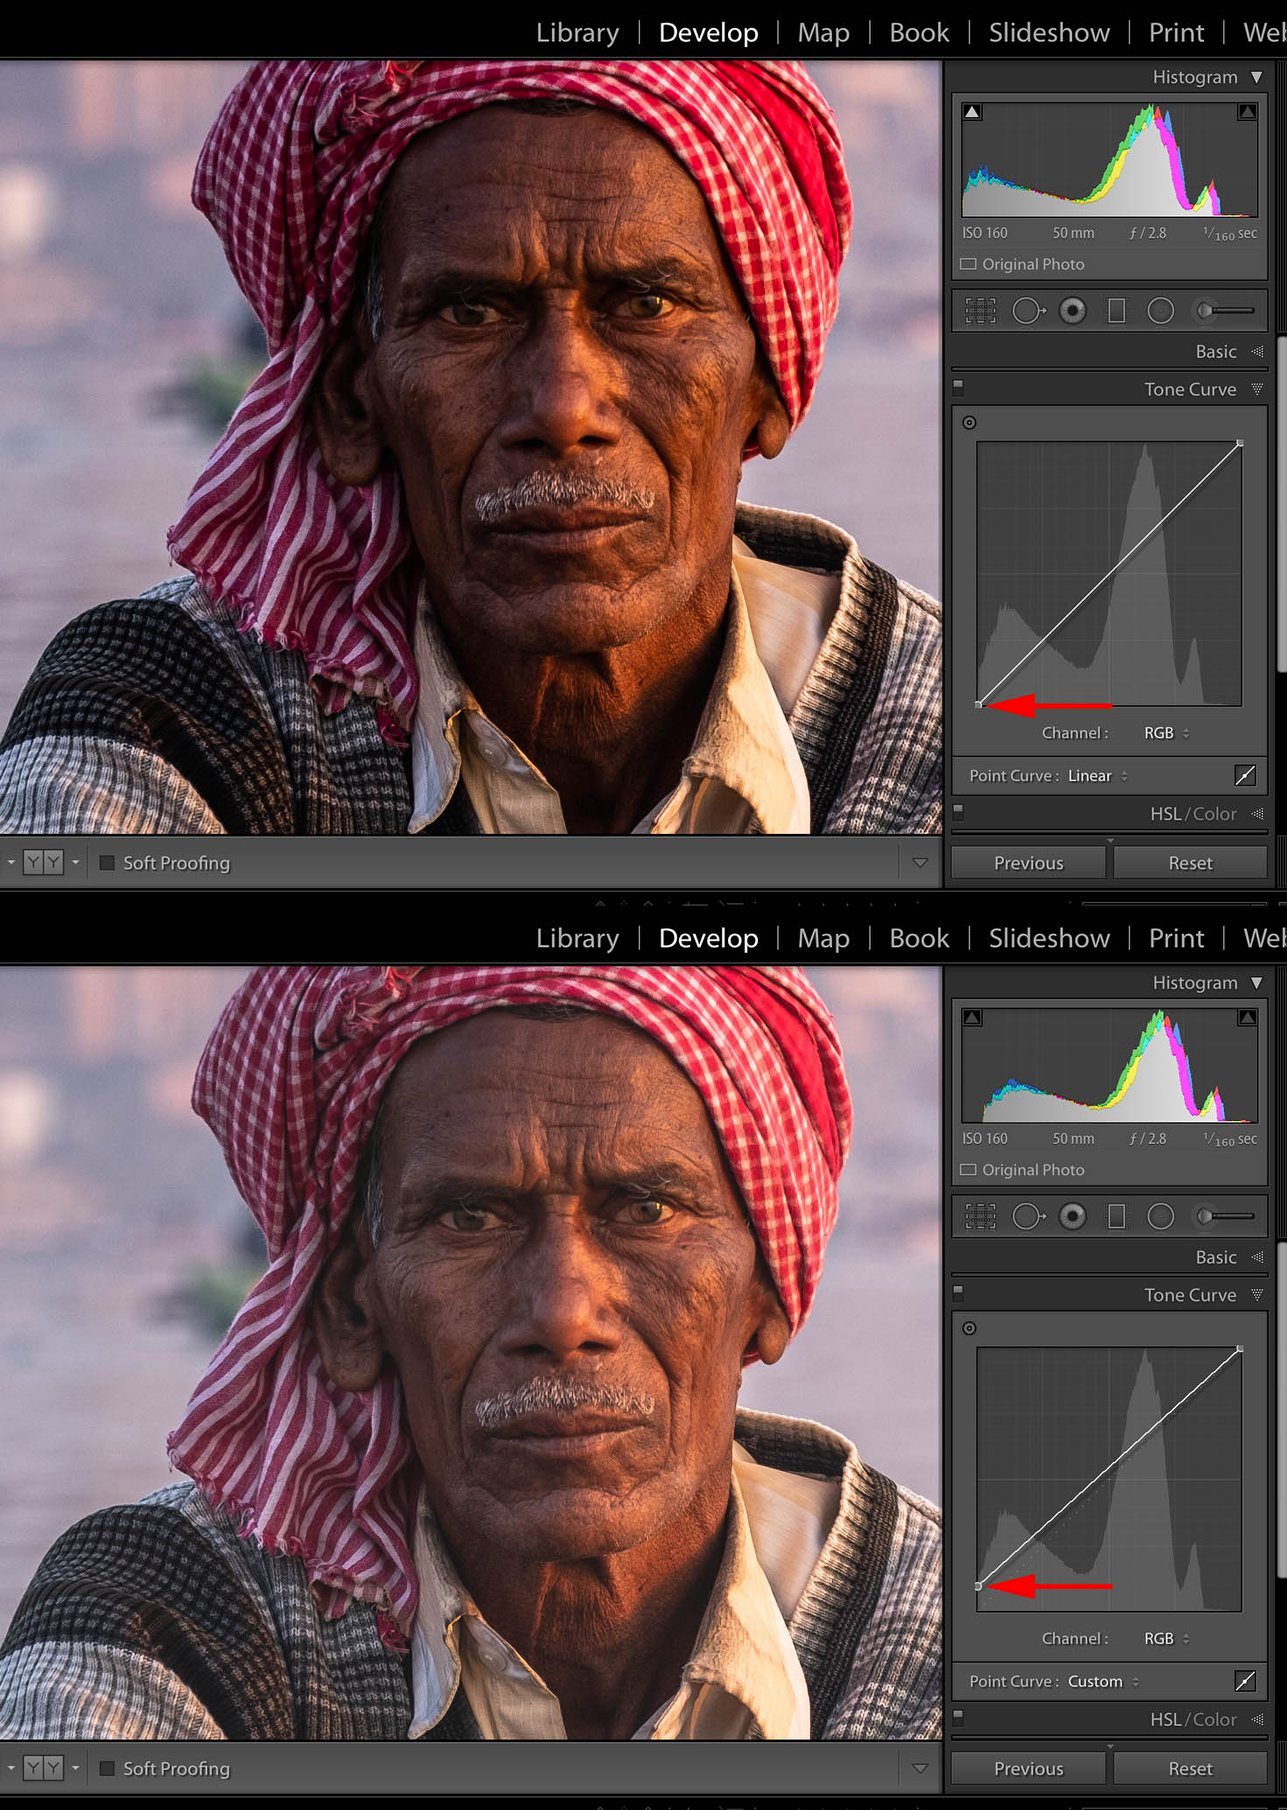
All you need to do is grab the black point on the tone curve and lift it up along the vertical axis, so that any blacks in the image essentially go to off-black (a dark grey). This then creates the “matte” effect in your image.
In the attached example, the top image shows the original image, which is quite contrasty and with a hard light. The red arrow points to where the black point is on the tone curve.
The bottom image shows the black point now lifted up the vertical axis, hence achieving a “matte” effect to the image. Note how the edited image looks less contrasty and you can now see more detail in the darks.
That’s it!

No Comments