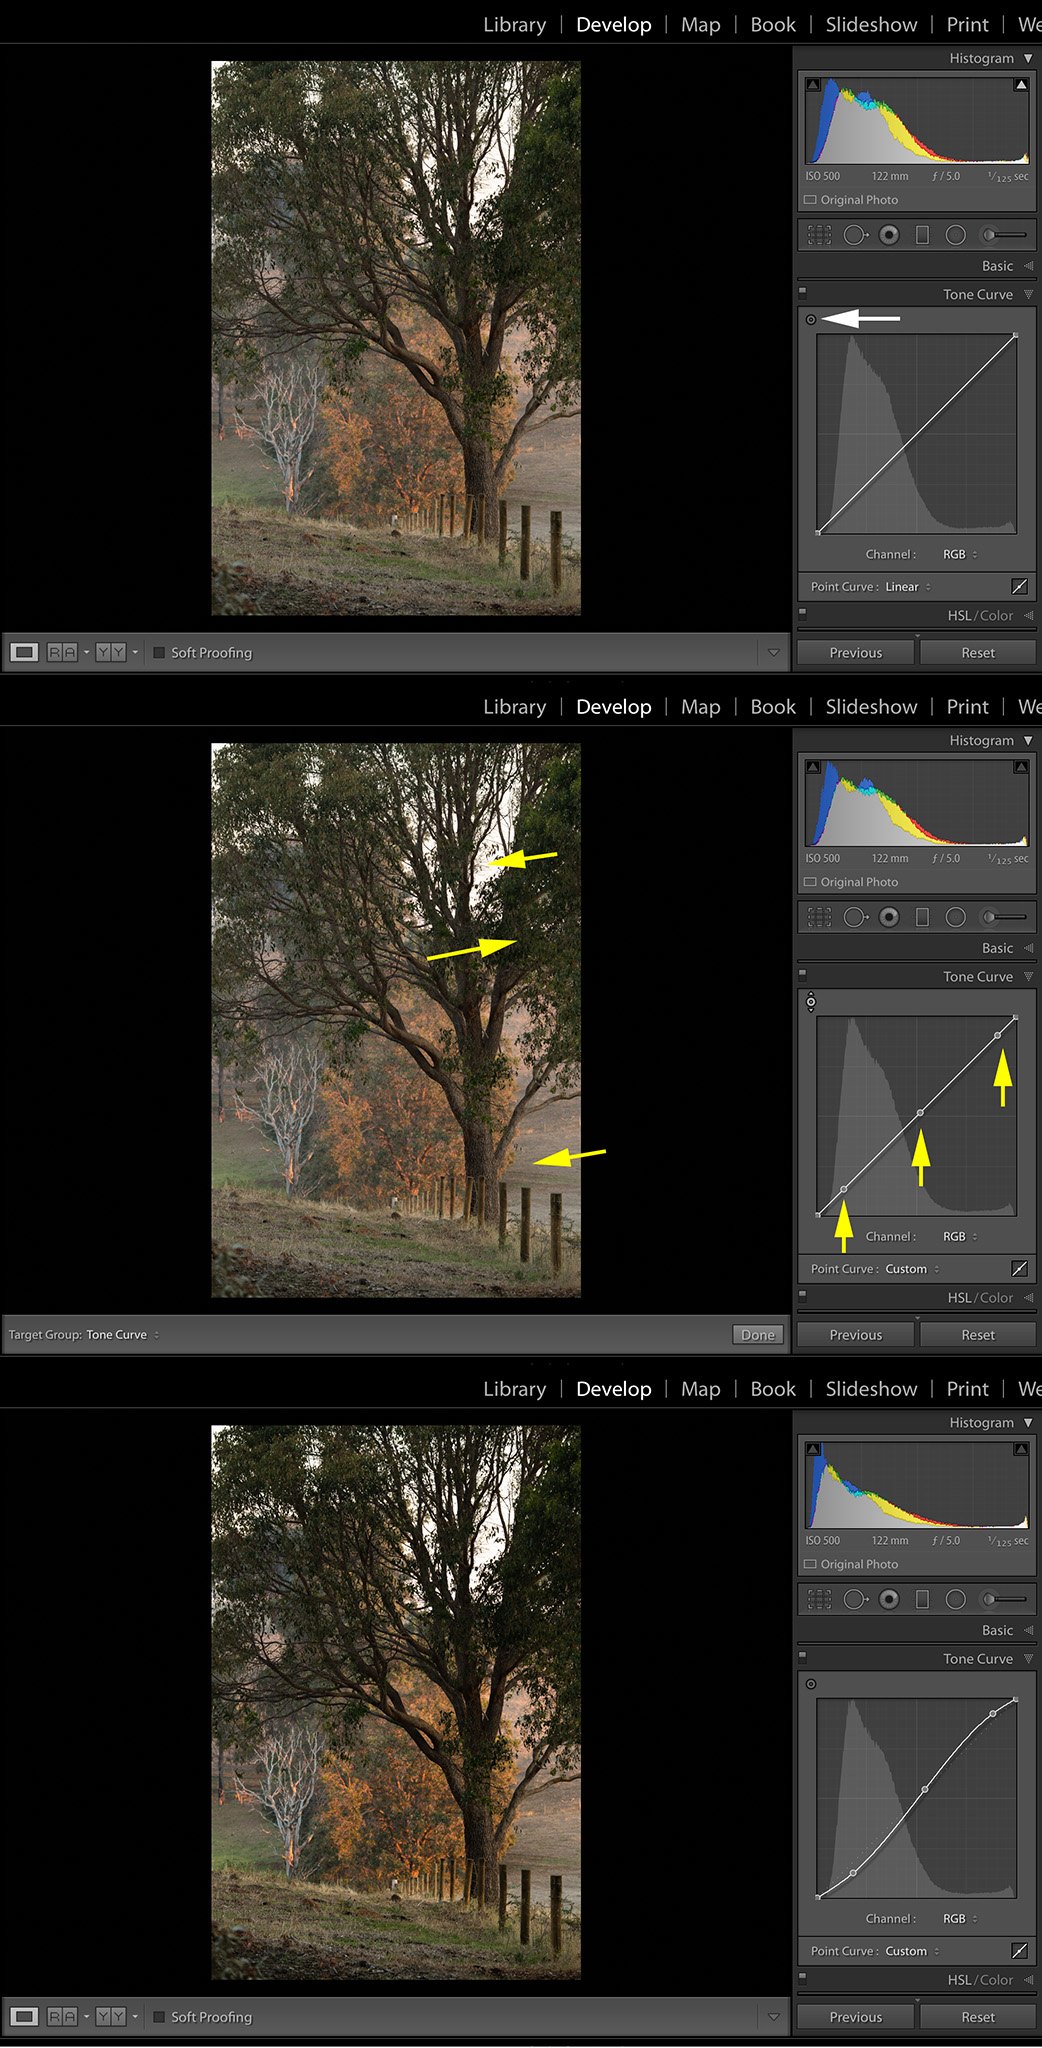
Lightroom Tip: Using the tone sampler in the Tone Curve Panel

The Tone Curve in Lightroom is a useful way to add contrast or adjust tones in your image (tone is the brightness/darkness of pixels in the image). Most people adjust the Tone Curve into an “S” shaped curve to give their image a bit of contrast and pop.
But, did you know that you can aim for more accurate tonal adjustment in the curve using the tone sampler that’s included in the Tone Curve panel?
The tone sampler is tiny and unless you’re eagle-eyed, you may miss it. Have a look at the top image — the white arrow points to the tone sampler.
When you click on the tone sampler, your pointer changes and becomes the sampler pointer. With this, you can then click on various parts of the image to find out where that part’s tone sits on the curve. In the middle image, I’ve clicked on three parts of the image — an area that’s dark (the leaves), an area that’s brighter (the paddock), and an area that’s very bright (the sky between the branches). As I click on each of these areas, a dot appears on the tone curve to tell me where the tone of that area is located in the curve.
Using the tone sampler, you can “sample” various areas in the image and then adjust its tone by simply dragging its dot on the curve. In the bottom image, I’ve dragged the three dots to create an “S” curve that makes use of the three sampled areas to add contrast to the image.
It’s a more accurate way of adjusting tones in your image using the Tone Curve than just randomly dragging parts of the curve!
Will you use this tip now?

No Comments