Lightroom Tip: Removing dust spots and other distractions

As much as we try to keep our camera sensors clean, chances are, specks of dust do get in and land on the sensor. When you start shooting at smaller aperture values, these dust specks appear in your image as slightly fuzzy but noticeable spots. This is where Lightroom’s Spot Removal tool comes in handy.
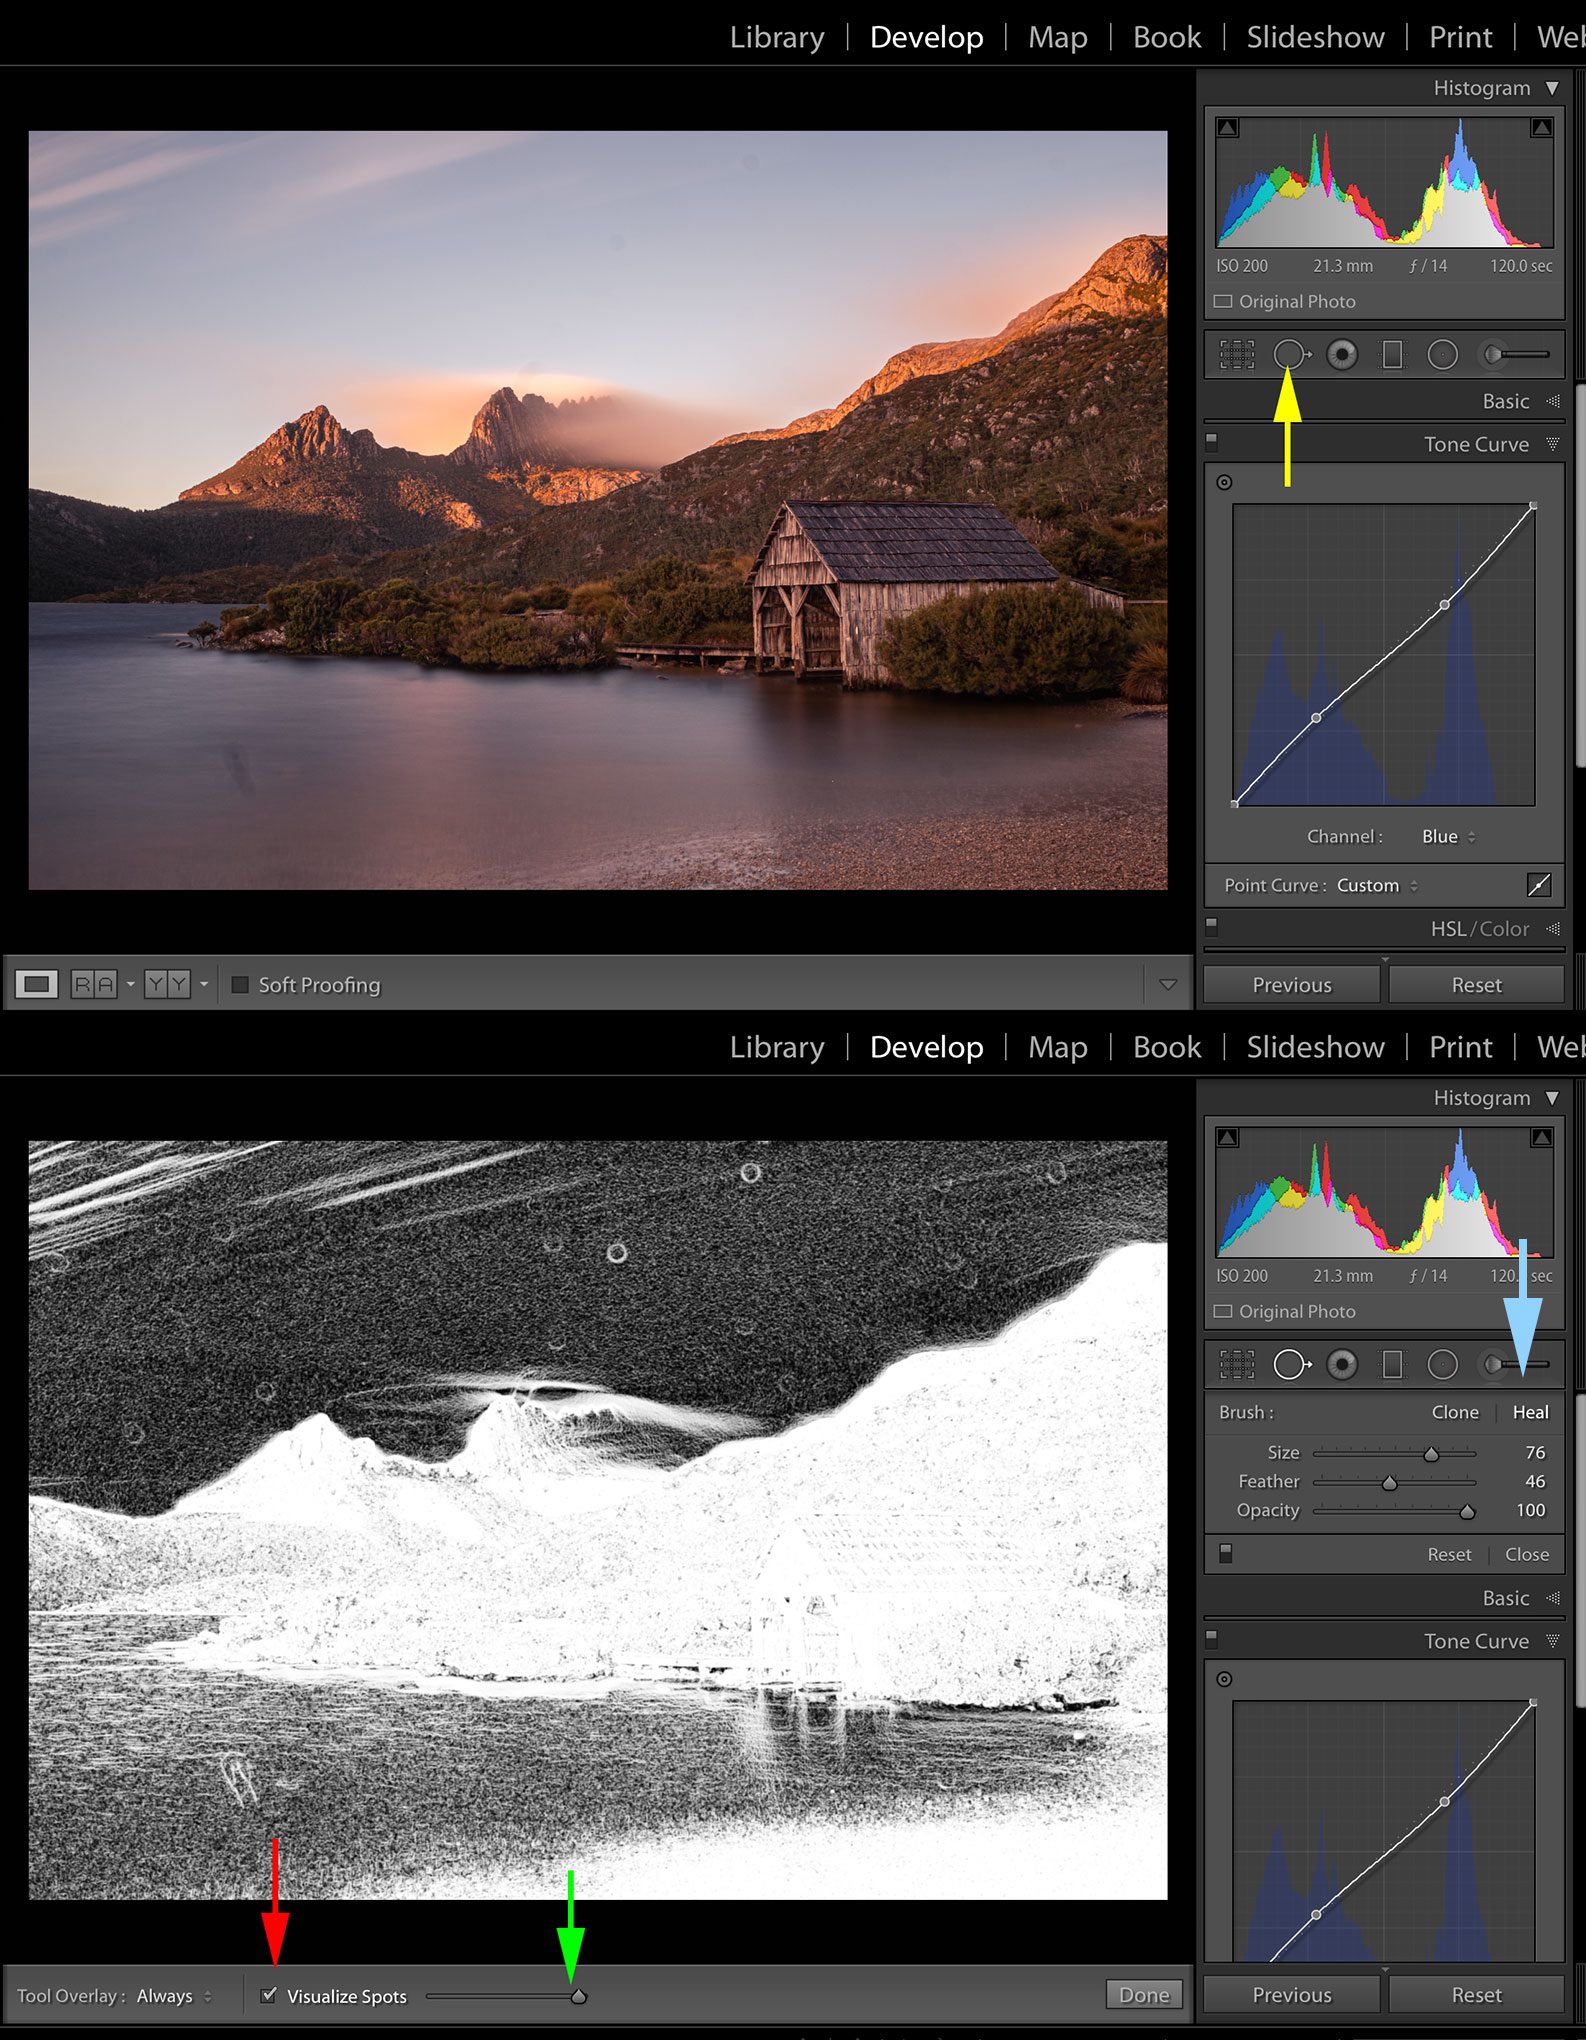
The tool is located in your Toolbar in the Develop Module (top image, yellow arrow). Click on it to activate the spot removal tool which allows you to then erase spots from your image.
But to erase these dust spots, you need to see them, and they may not appear as visible in your natural image in Lightroom. Well, today’s tip is all about how you can hunt down those pesky spots!
Once you have activated the Spot Removal tool, look to the bottom of the Lightroom screen to find a little slider and a checkbox next to “Visualise Spots” (bottom image, red and green arrows). When you check the box, Lightroom displays a black and white overlay which shows the detail in your image. Move the slider to the right in order to view more detail — and those dust spots will begin to appear!
Just use the spot removal tool to remove those spots! When you’re done, click the DONE button to return to your spot-free image!
HOT TIP 1: Set your spot removal tool mode to “Heal” instead of “Clone” (bottom image, blue arrow); this way, the spot removal tool will sample somewhere else in the image to heal the spot.
HOT TIP 2: You can use the square brackets on your keyboard ( [ and ] ) to change the size of your spot removal pointer. Use this set the size of the pointer to just a little larger than the spot!

No Comments