Lightroom Tip: Enhancing the “golden glow” of sunset

This tip is all about adding the golden glow of sunlight into your images. It can be used for landscapes, or even for portraits (to give your portraits that warm, soft glow of light, as if there’s a bit of sunset peeking in from just out of frame). It makes use of local adjustment tools (the “Radial Filter Tool” – my fave, as well as the “Gradient Filter Tool”), so it’s worthwhile your getting to understand the use of these local adjustment tools before you tackle this tip.
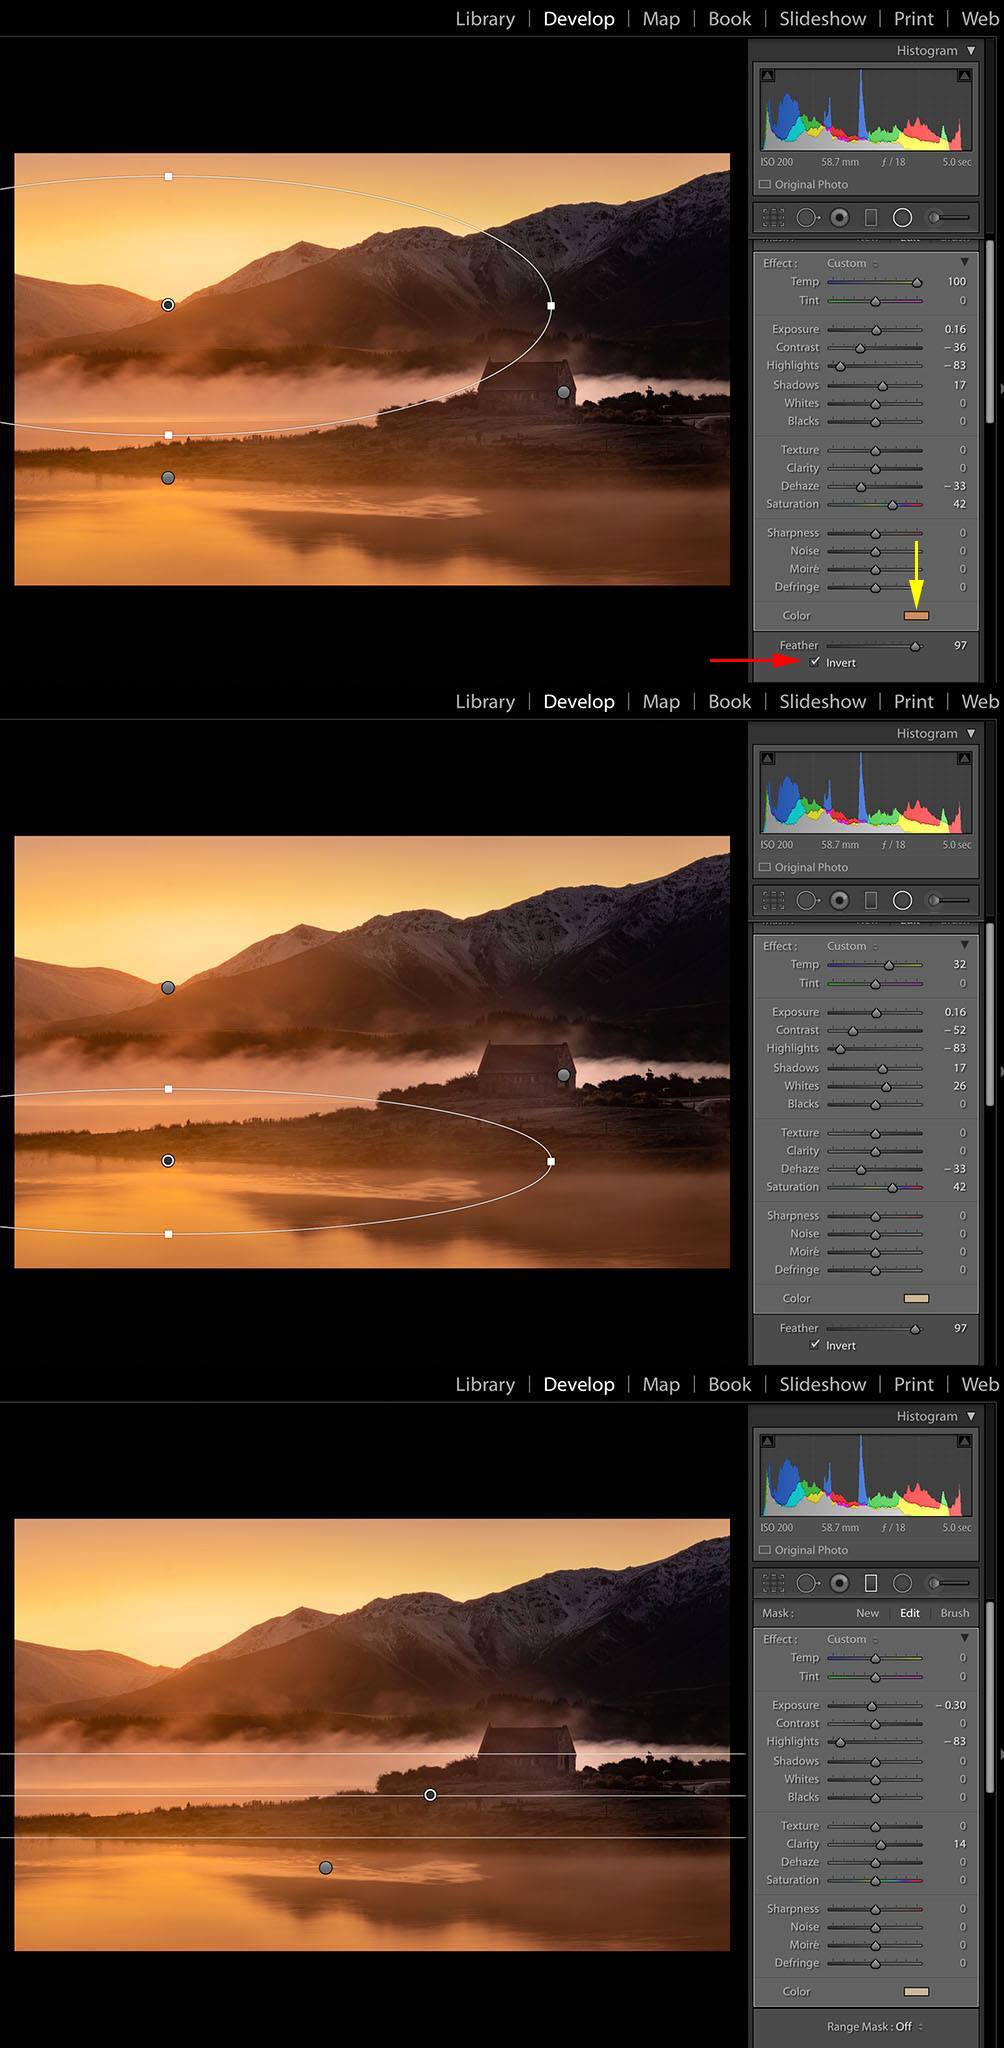
Adding a bit of sunset/sunrise golden glow can help create mood and emotion in your image; and, let’s face it, who doesn’t like the colour orange? 🙂 The first thing you need to do is create a radial filter around the area where you’d like to add that glow — in this case, it’s the bit between the mountains on the left of Image 1. This is where the sun will rise, so I thought adding the warm glow there can give the impression of a beautiful, golden sunrise suffusing the air.
Draw your radial shape (an ellipse) using the radial filter and make sure that you check the “Invert” checkbox at the bottom of the panel, which makes the adjustment appear _inside_ the ellipse (see red arrow in Image 1). By default, this box isn’t checked, which makes the adjustment appear _outside_ the ellipse. I work with adjustmensts _inside_ the radial filters about 90% of the time, so I have this box checked by default everytime I open the radial filter tool.
Once you have drawn the ellipse, now comes the fun part. To add a warm glow, increase the colour temperature using the colour slider and play around with the highlights, contrast and shadows slider for effect. Pull the Dehaze slider to the left (ie. add “haze”) if you’d like to create a misty morning glow effect (which I’ve done in the top image). You an also increase the saturation too if you like that kind of look.
You can colourise this adjustment by selecting the “Color” box at the bottom of the adjustment panel (yellow arrow in Image 1), and the using the eye dropper tool, select a warm colour from the available colour ranges. In Image 1, I’ve selected a soft orange hue to add some punch to the golden glow of sunrise.
Image 2 is all about mirroring the effects of the soft golden light in the mountains in the reflections of the lake (Lake Tekapo in NZ, if you’re asking 🙂 ). So I’ve simply drawn another radial filter ellipse there and tweaked the sliders and colour to mirror the glow of light and colour in the mountains.
Finally, you can also use the same technique with the Gradient Filter (Image 3), to punch up the light and golden colour in the lake. If you use Adjustment Brushes, then you can also do the same with these.
So, there you have it. An “easy peasy lemon squeezy” way of adding a soft, golden light into your images. Once you have mastered this technique, try different adjustments and colours to see what results. Get creative and experimental.

No Comments