
Light in the Urban Environment
As you walk through any city during daylight hours, you’ll gradually realises how light plays through urban structures; the way it reflects and bounces off reflective surfaces like steel and glass, and the way in which concrete walls and structures control the spread of light as it spills between narrow laneways, grazes the edges of staircases and transforms glass, steel and stone into bold arrangements of shape and shadow.
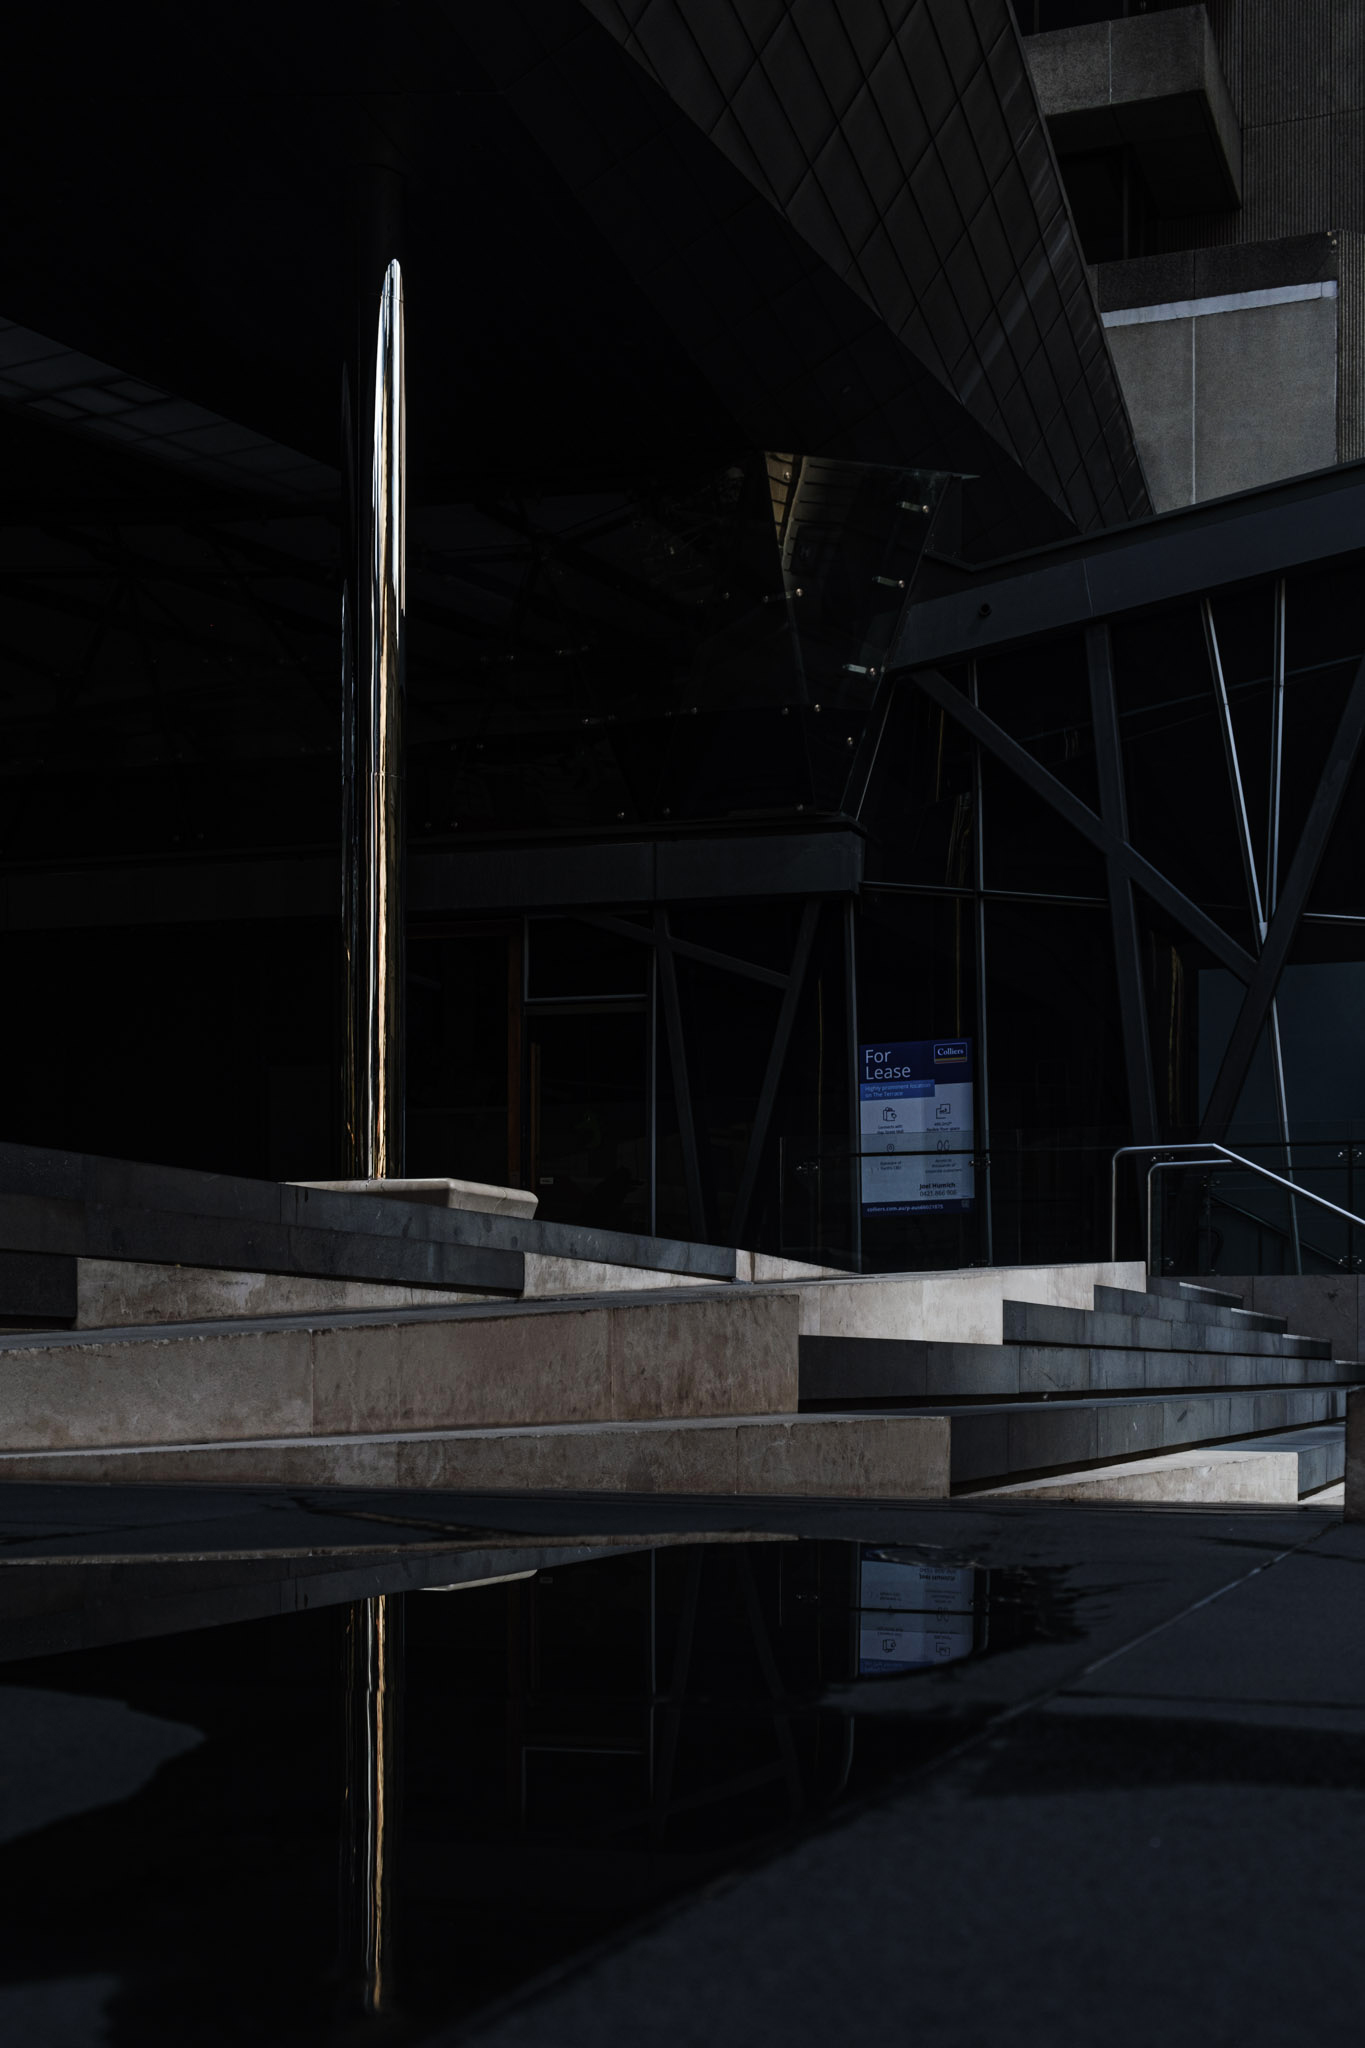
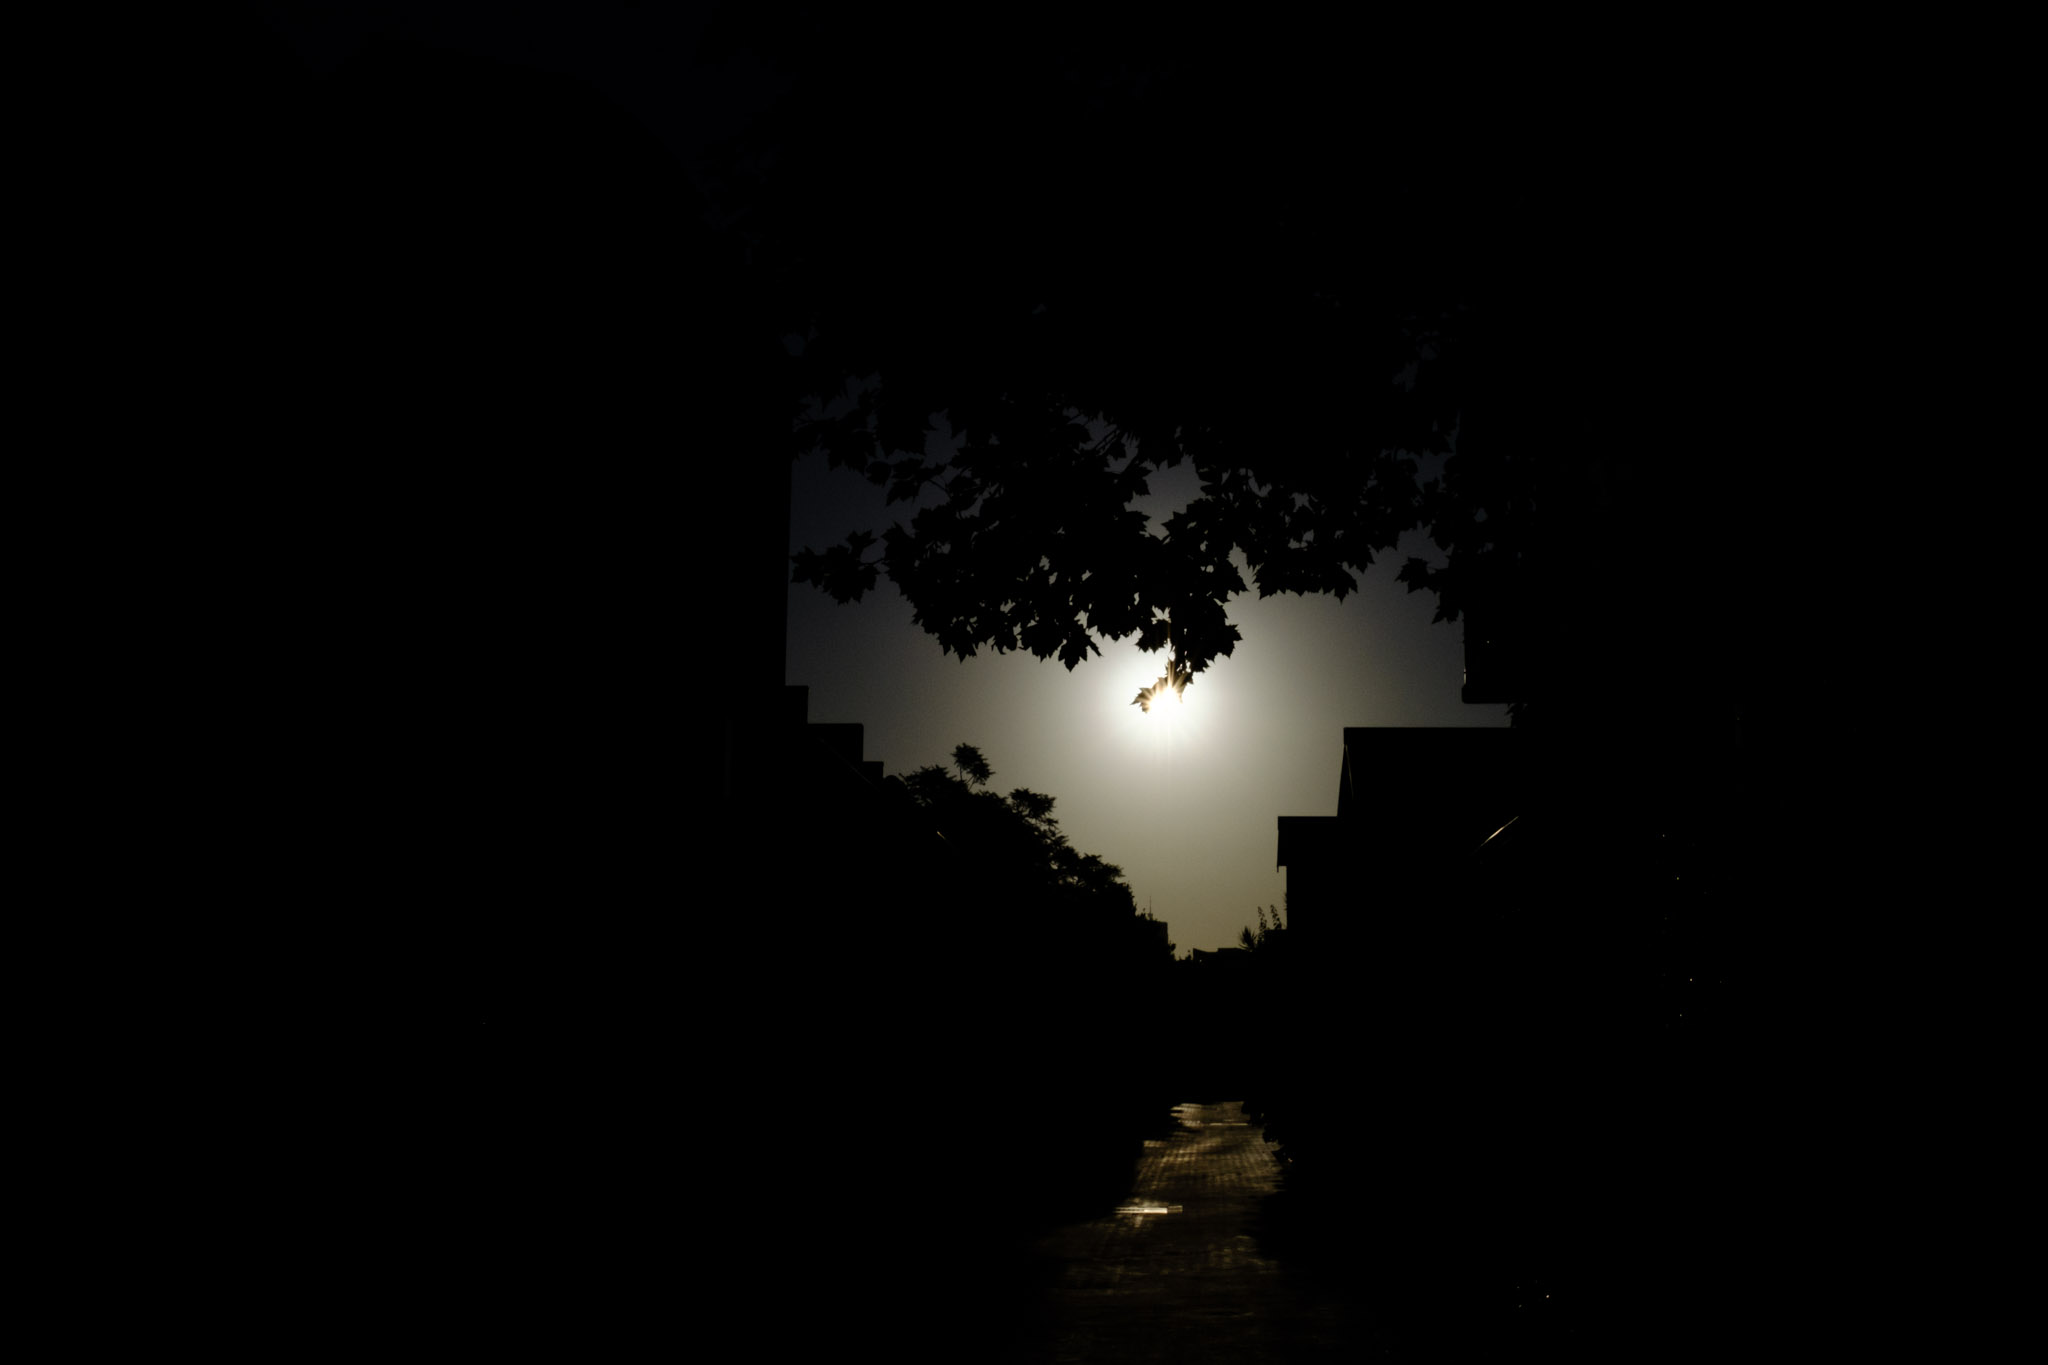
A classic example of a partially lit urban environment. By training your eye to look for light, instead of structures or subjects, you’ll soon find scenes like this.
This article explains how you can shoot and capture these scenes by exposing for highlights (by underexposing your image), to make the bright aspects pop against the darker shadows around them.
For photographers, these shafts and pools of light make for interesting urban captures. Instead of photographing whole buildings, we begin searching for instances when directional light strikes a facade or a street scape, the sharp boundary where light gives way to shadow. These are scenes where the right exposure and strong composition can work to produce images that are dramatic, elegant and impactful in their simplicity.
When capturing scenes like that, we need to be selective about what it is we want in the frame, and how we want to include it. Some of the most striking urban photographs hone in on contrast, allowing brilliant highlights to coexist with deep, mysterious shadows, often using shadows as negative space to frame the highlights.
In urban environments, particularly during Winter, light becomes beautifully directional, creating long shadows, crisp edges and dramatic patterns across buildings. It’s a great way to train your eye to “see the light” and to compose for it.
Scenes with splashes of lit areas surrounded by shadows are what we call “high contrast scenes” — which means that we have areas that are very dark, and areas that are very bright, and very little in between. To capture resonant and evocative light like this, you need to learn how to expose for the highlights.
Exposing for Highlights
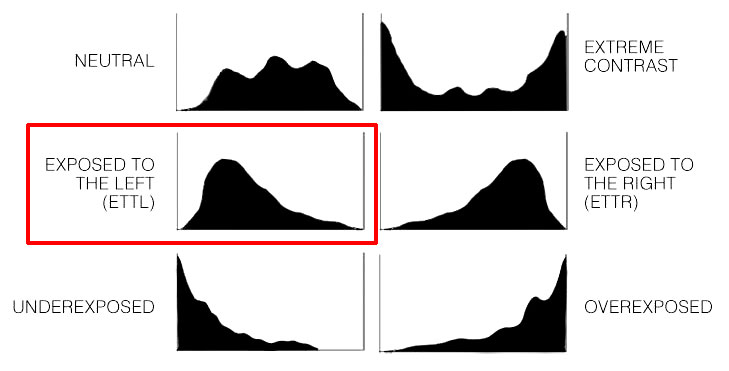
Modern digital cameras retain an impressive amount of information in the shadows, but once highlights are blown, that detail is usually gone forever. Before taking the photograph, identify the brightest area that matters most in your composition. This might be a sunlit wall, a bright window reflecting the sunlight, or the illuminated edge of a staircase. Meter for that area, or underexpose by around about one stop (-1 EV) or a little more. Adjust the underexposure for the kind of dramatic scene you’d like to create. Your photograph may appear darker overall, but the important highlight detail will remain intact.
Don’t rely solely on the camera’s rear screen when checking exposure. Bright daylight can make images appear darker than they really are. Instead, develop the habit of checking the Histogram. Ideally, the graph should approach the right-hand edge without touching it or bunching up against it or being clipped off at the right. If highlight warnings begin flashing, reduce your exposure slightly using negative exposure compensation. A quick adjustment of -0.7 to -1.3 EV is often all that’s needed to protect delicate highlight detail; more if you’d like the shadows to be more dominant. This method of underexposure using the histogram is called “expose to the left” (ETTL).
Settings
For many situations, Aperture Priority mode combined with exposure compensation will be sufficient for you to capture scenes like this. Set the aperture that gives you the desired depth of field (usually f/8 to f/10 if shooting urban abstracts), keep your ISO in the mid-range—typically ISO 200 or 400—and allow the shutter speed to adjust automatically.
If the lighting is consistent, switching to Manual Exposure prevents your camera from changing the exposure every time you recompose. Still use the -0.7 to -1.3 (or more) under exposure on your Manual meter to preserve the highlights.
Seeing the Light
Learning to see the light is what transforms ordinary scenes into compelling images.
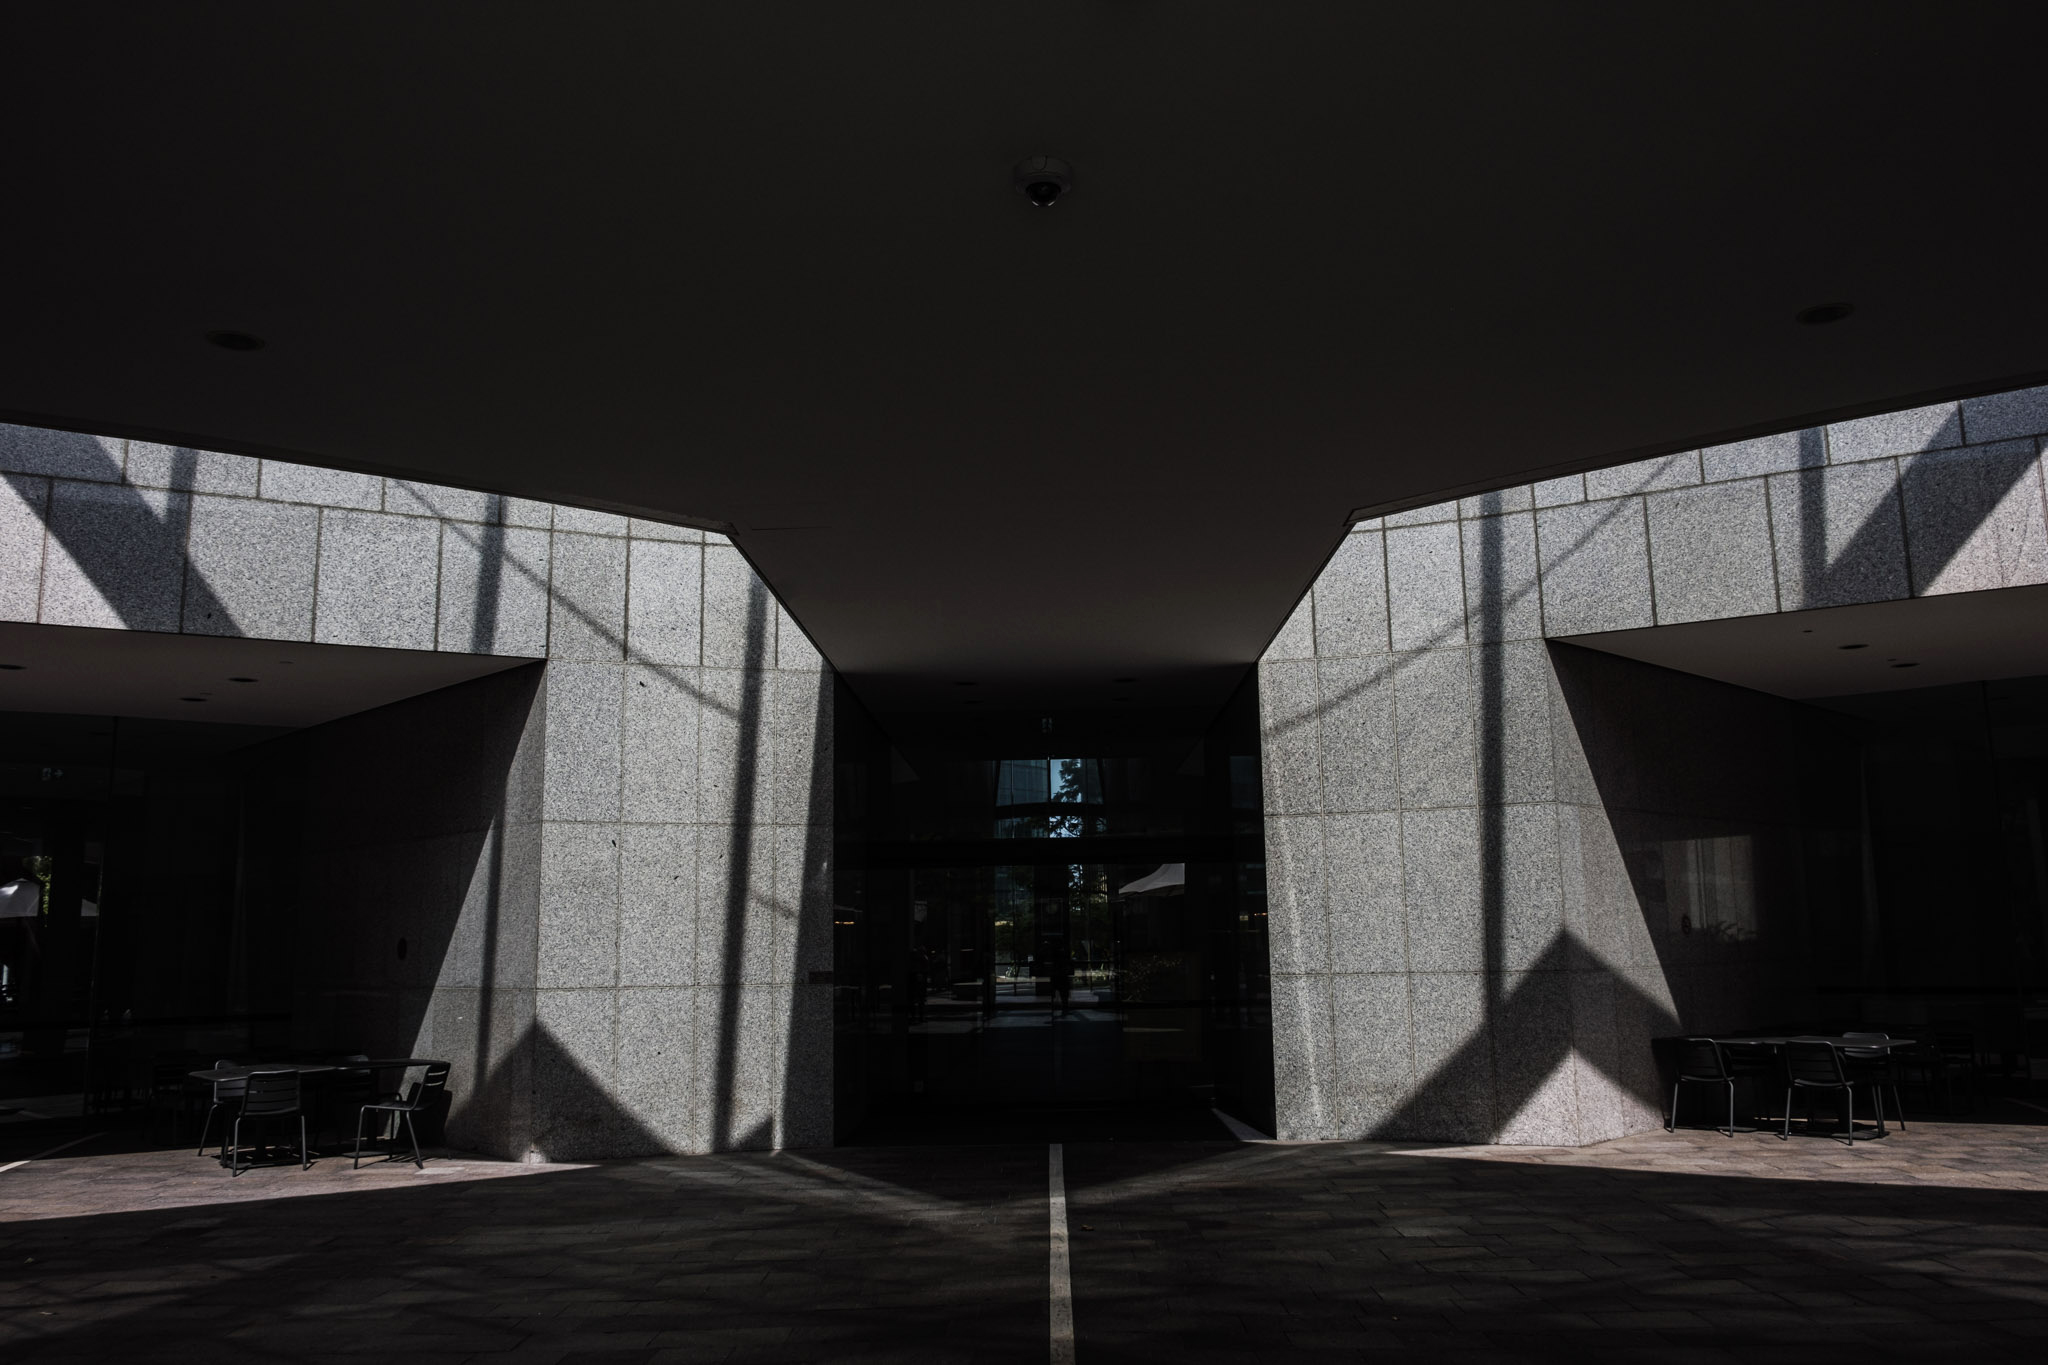
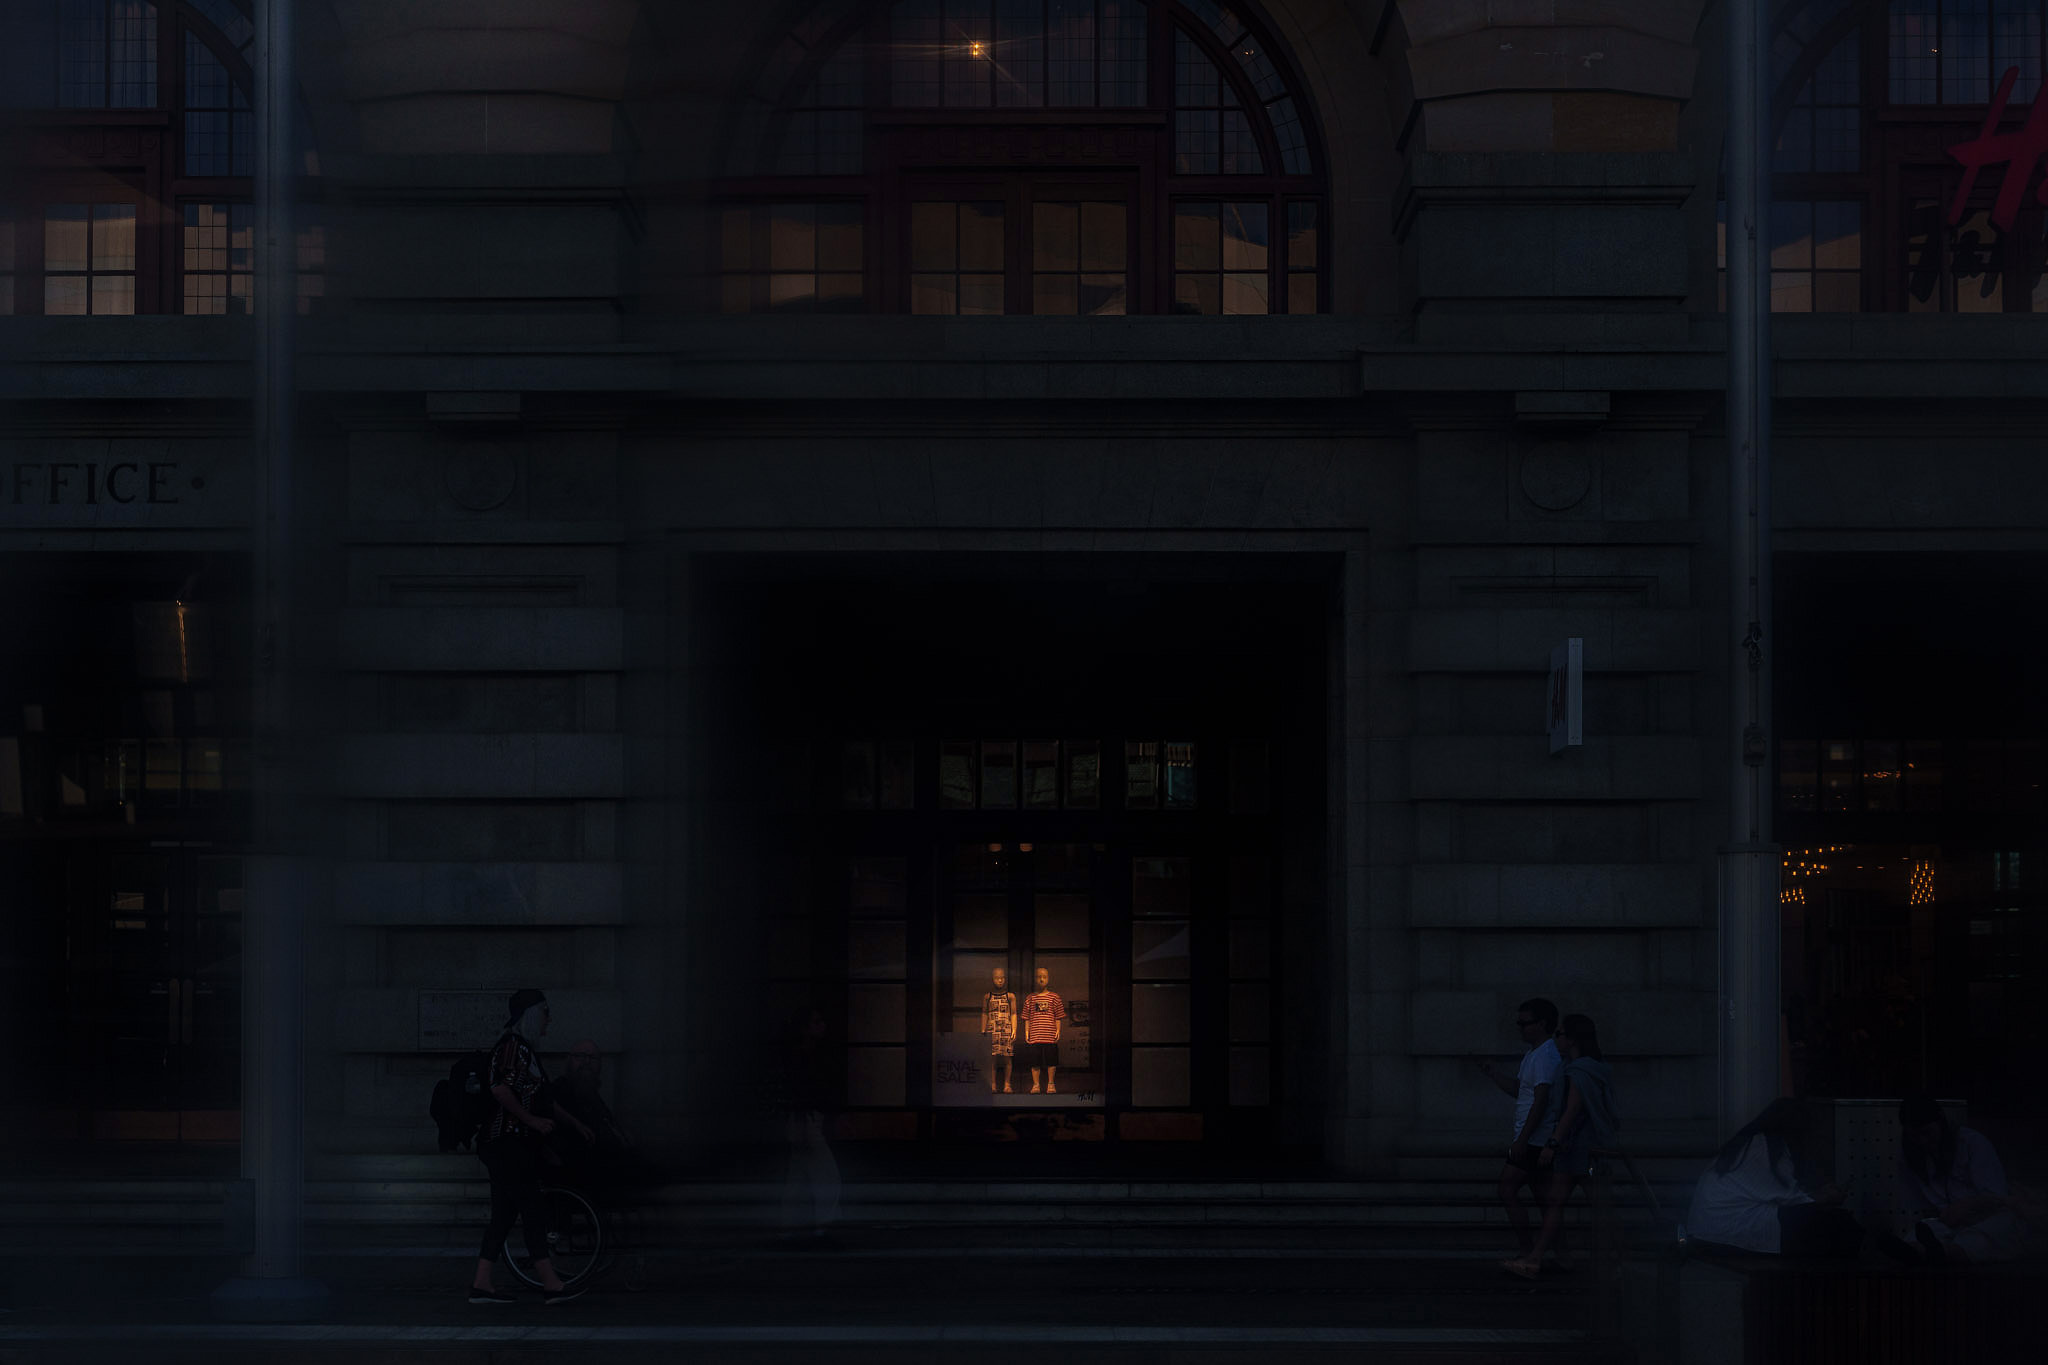
Instead of photographing the entire building, look for a single section that catches the light while the surrounding areas disappear into darkness. Stop looking for interesting subjects and start looking for interesting light. Your eye will begin noticing bright patches of sunlight before it notices buildings.
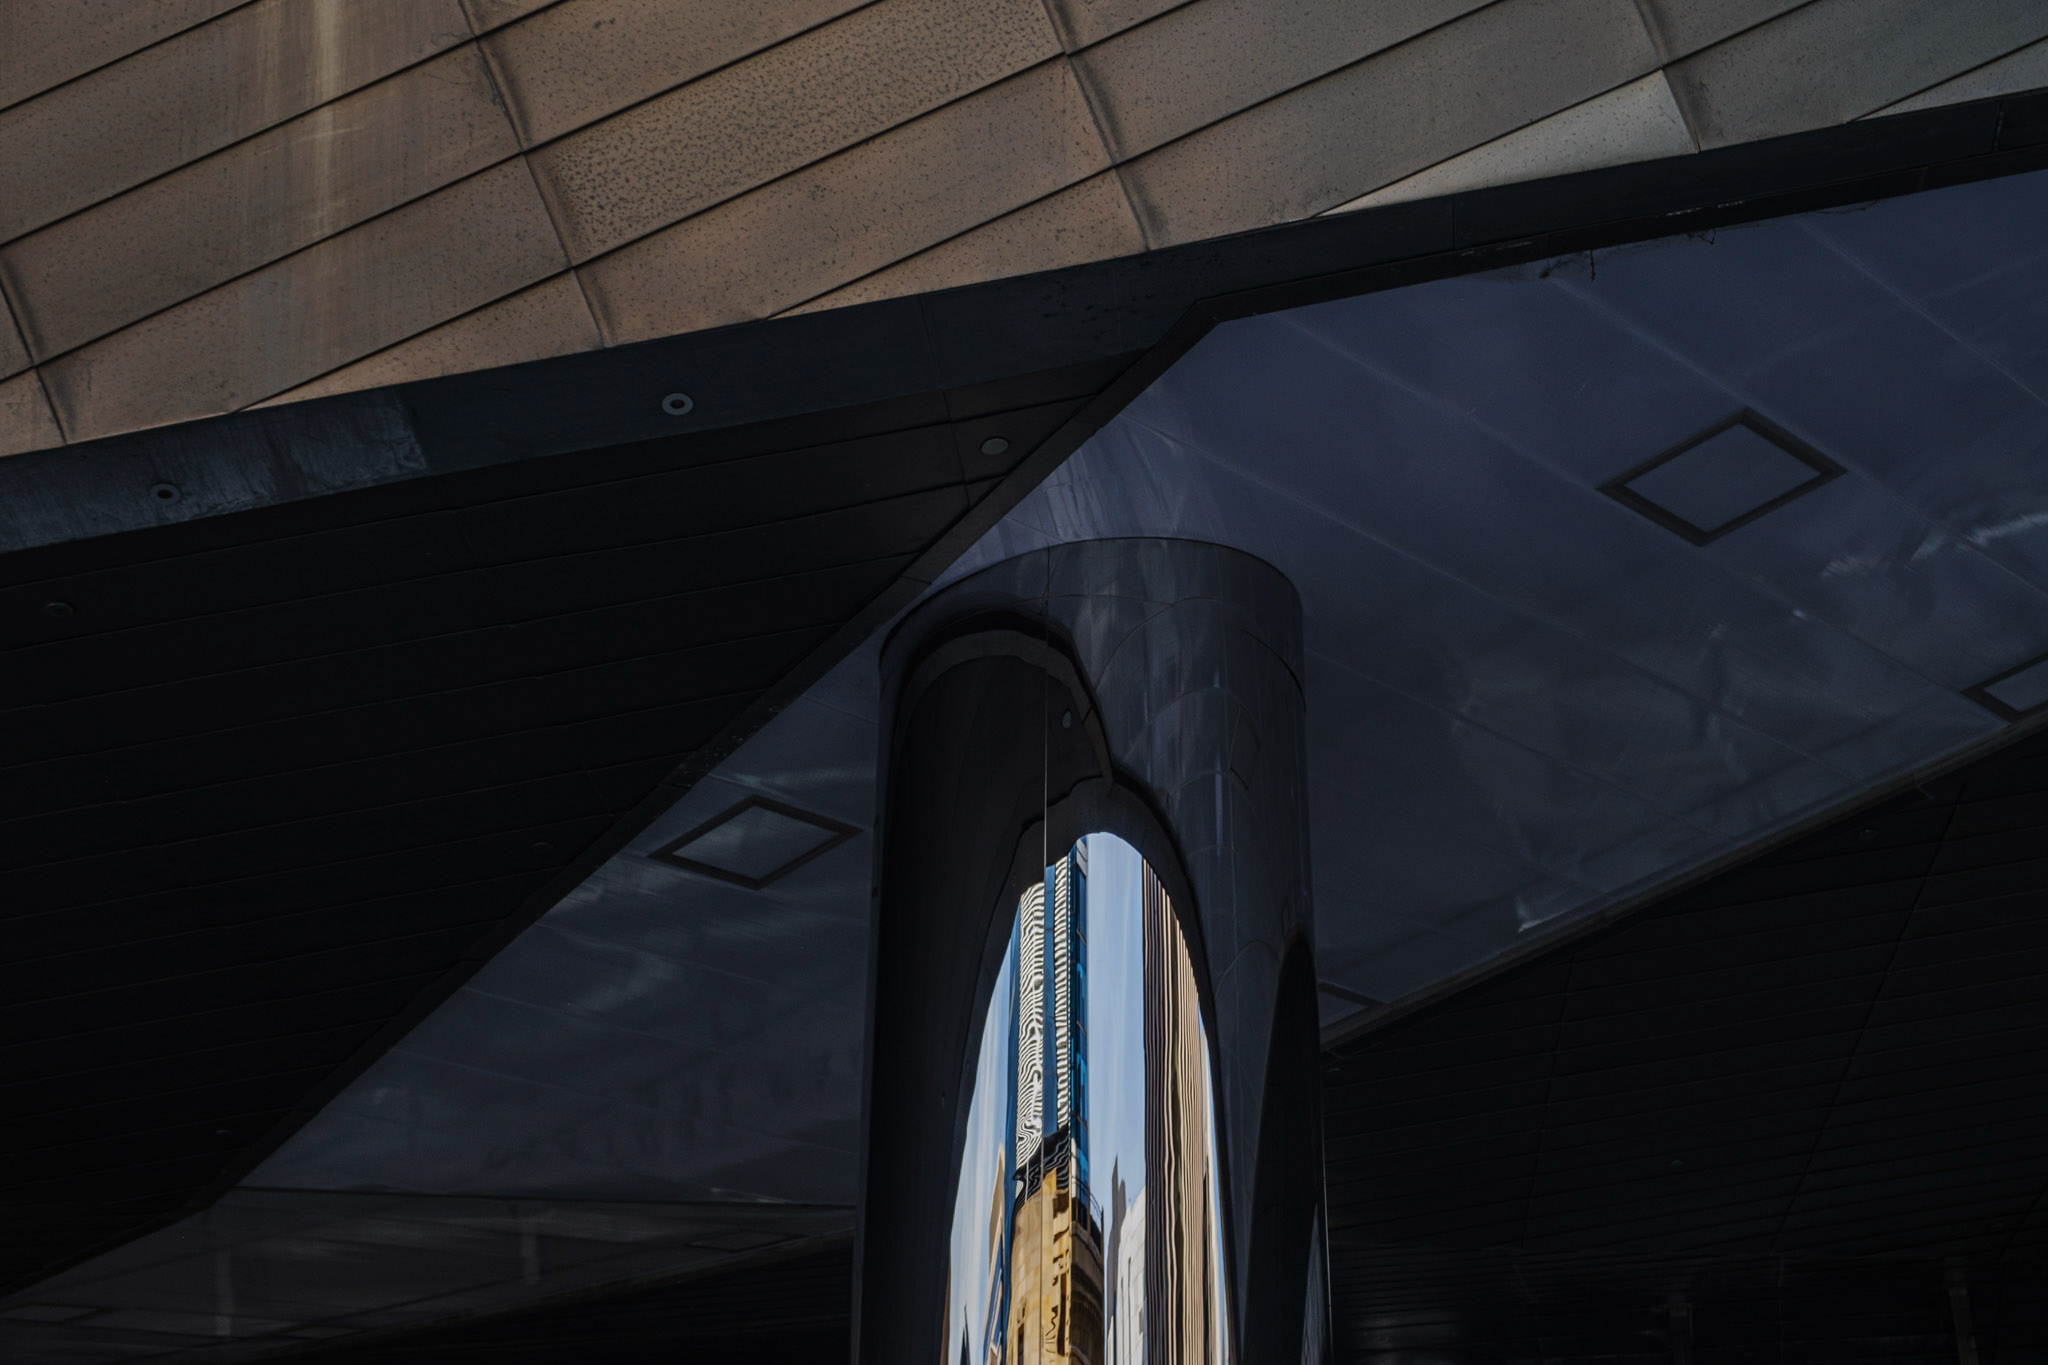
Equally important are the shadows. In this style of photography, shadow is one of your greatest compositional tools. Deep areas of darkness create negative space that simplifies an image and directs the viewer’s attention exactly where you want it. They hide distractions, isolate architectural details, and can help create minimalist compositions. Think of shadows as bold graphic shapes that balance the composition.
Remember to also explore the edges of buildings. Some of the most compelling architectural abstracts occur where light is just beginning—or just ending. Walk around a structure and observe how sunlight wraps around corners, revealing one surface while plunging another into darkness. Often, moving only a metre or two completely changes the relationship between light and shadow.
Not every shadow needs detail. Allow blacks to become truly black when they enhance your composition. By exposing for the highlights and letting the shadows fall naturally, you create photographs with mood, depth and visual impact. Shooting in RAW gives you the flexibility to recover subtle shadow detail later if needed, but the goal should never be to reveal everything.
Simple vs complex compositions
There is no “right” way to compose your images when shooting urban abstracts or architecture. But there are “wrong” ways to compose (if that makes sense).
The key to designing an effective composition in your image is to look at where you want the viewer’s gaze to go within your frame. This can work for both simple and complex (or busy) compositions.
Simple compositions make for “easy to digest” images. Use negative space or lines to lead the eye into and around the frame.

In the examples above, a combination of lines, colour and contrast help move the gaze through the frame. In the first image, the contrast between the white and black parts of the wall guide our gaze between the stacks of metal fencing in the lower half, and the window (and reflection) in the upper half. When I took this image, I was drawn to the static metal fences and the reflection which shows a small tree rising out of the mass of urban structures. For me, this was more about the way urban spaces crowded around an element of nature, almost overwhelming it.
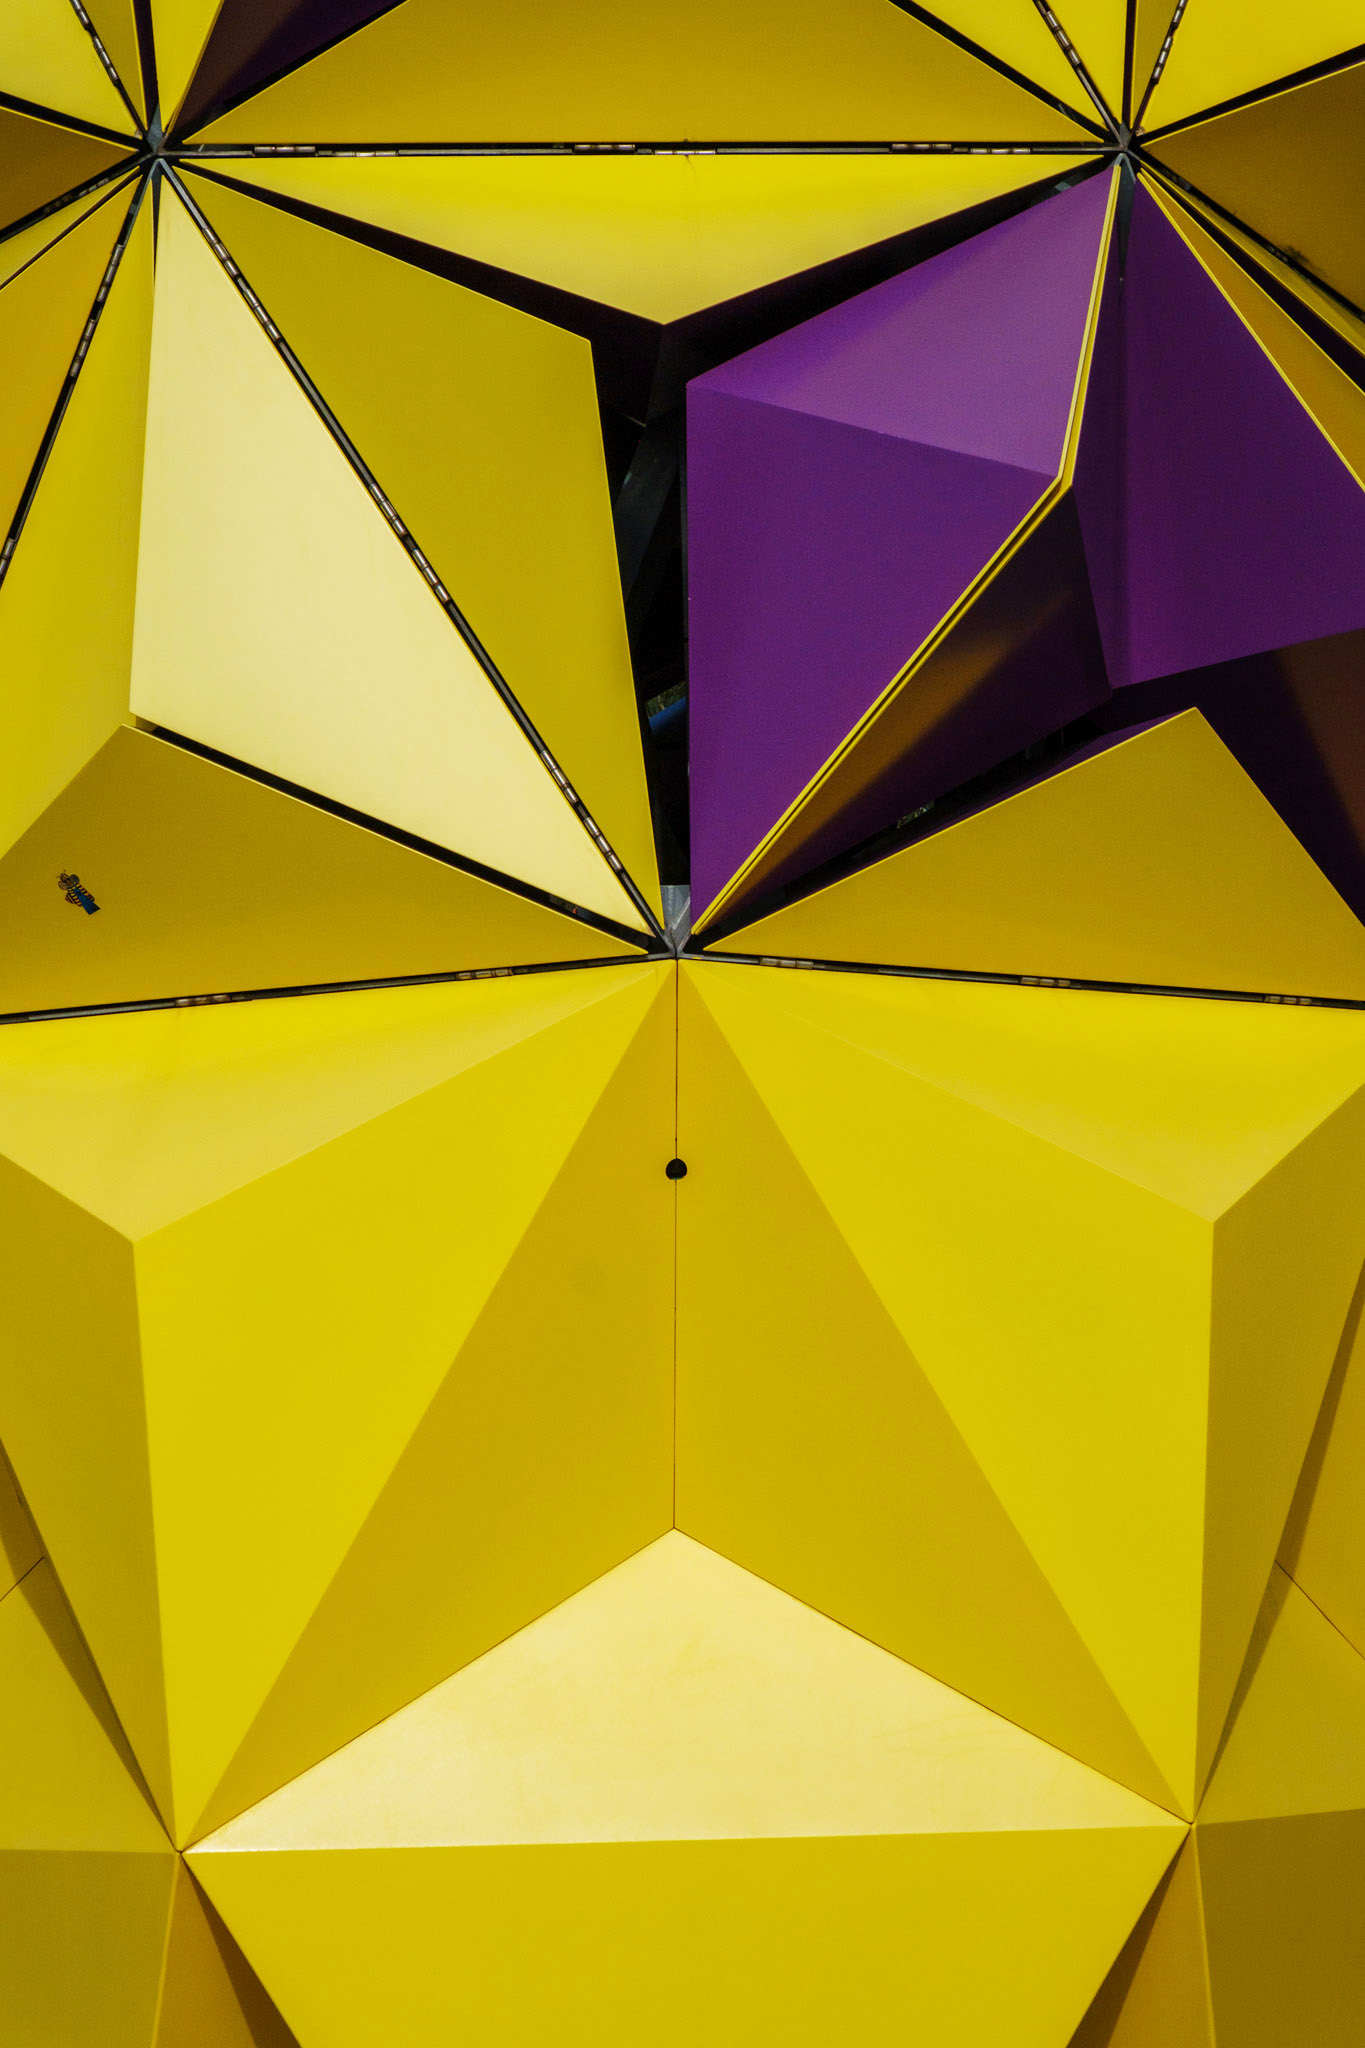
The second image is a simpler composition, using the converging lines to draw the gaze into the frame, and using the strong colour contrast between the purple panels and the yellow panels to anchor the gaze inside the frame.
More complex or busy compositions still need something guiding the gaze and anchoring it within the frame.
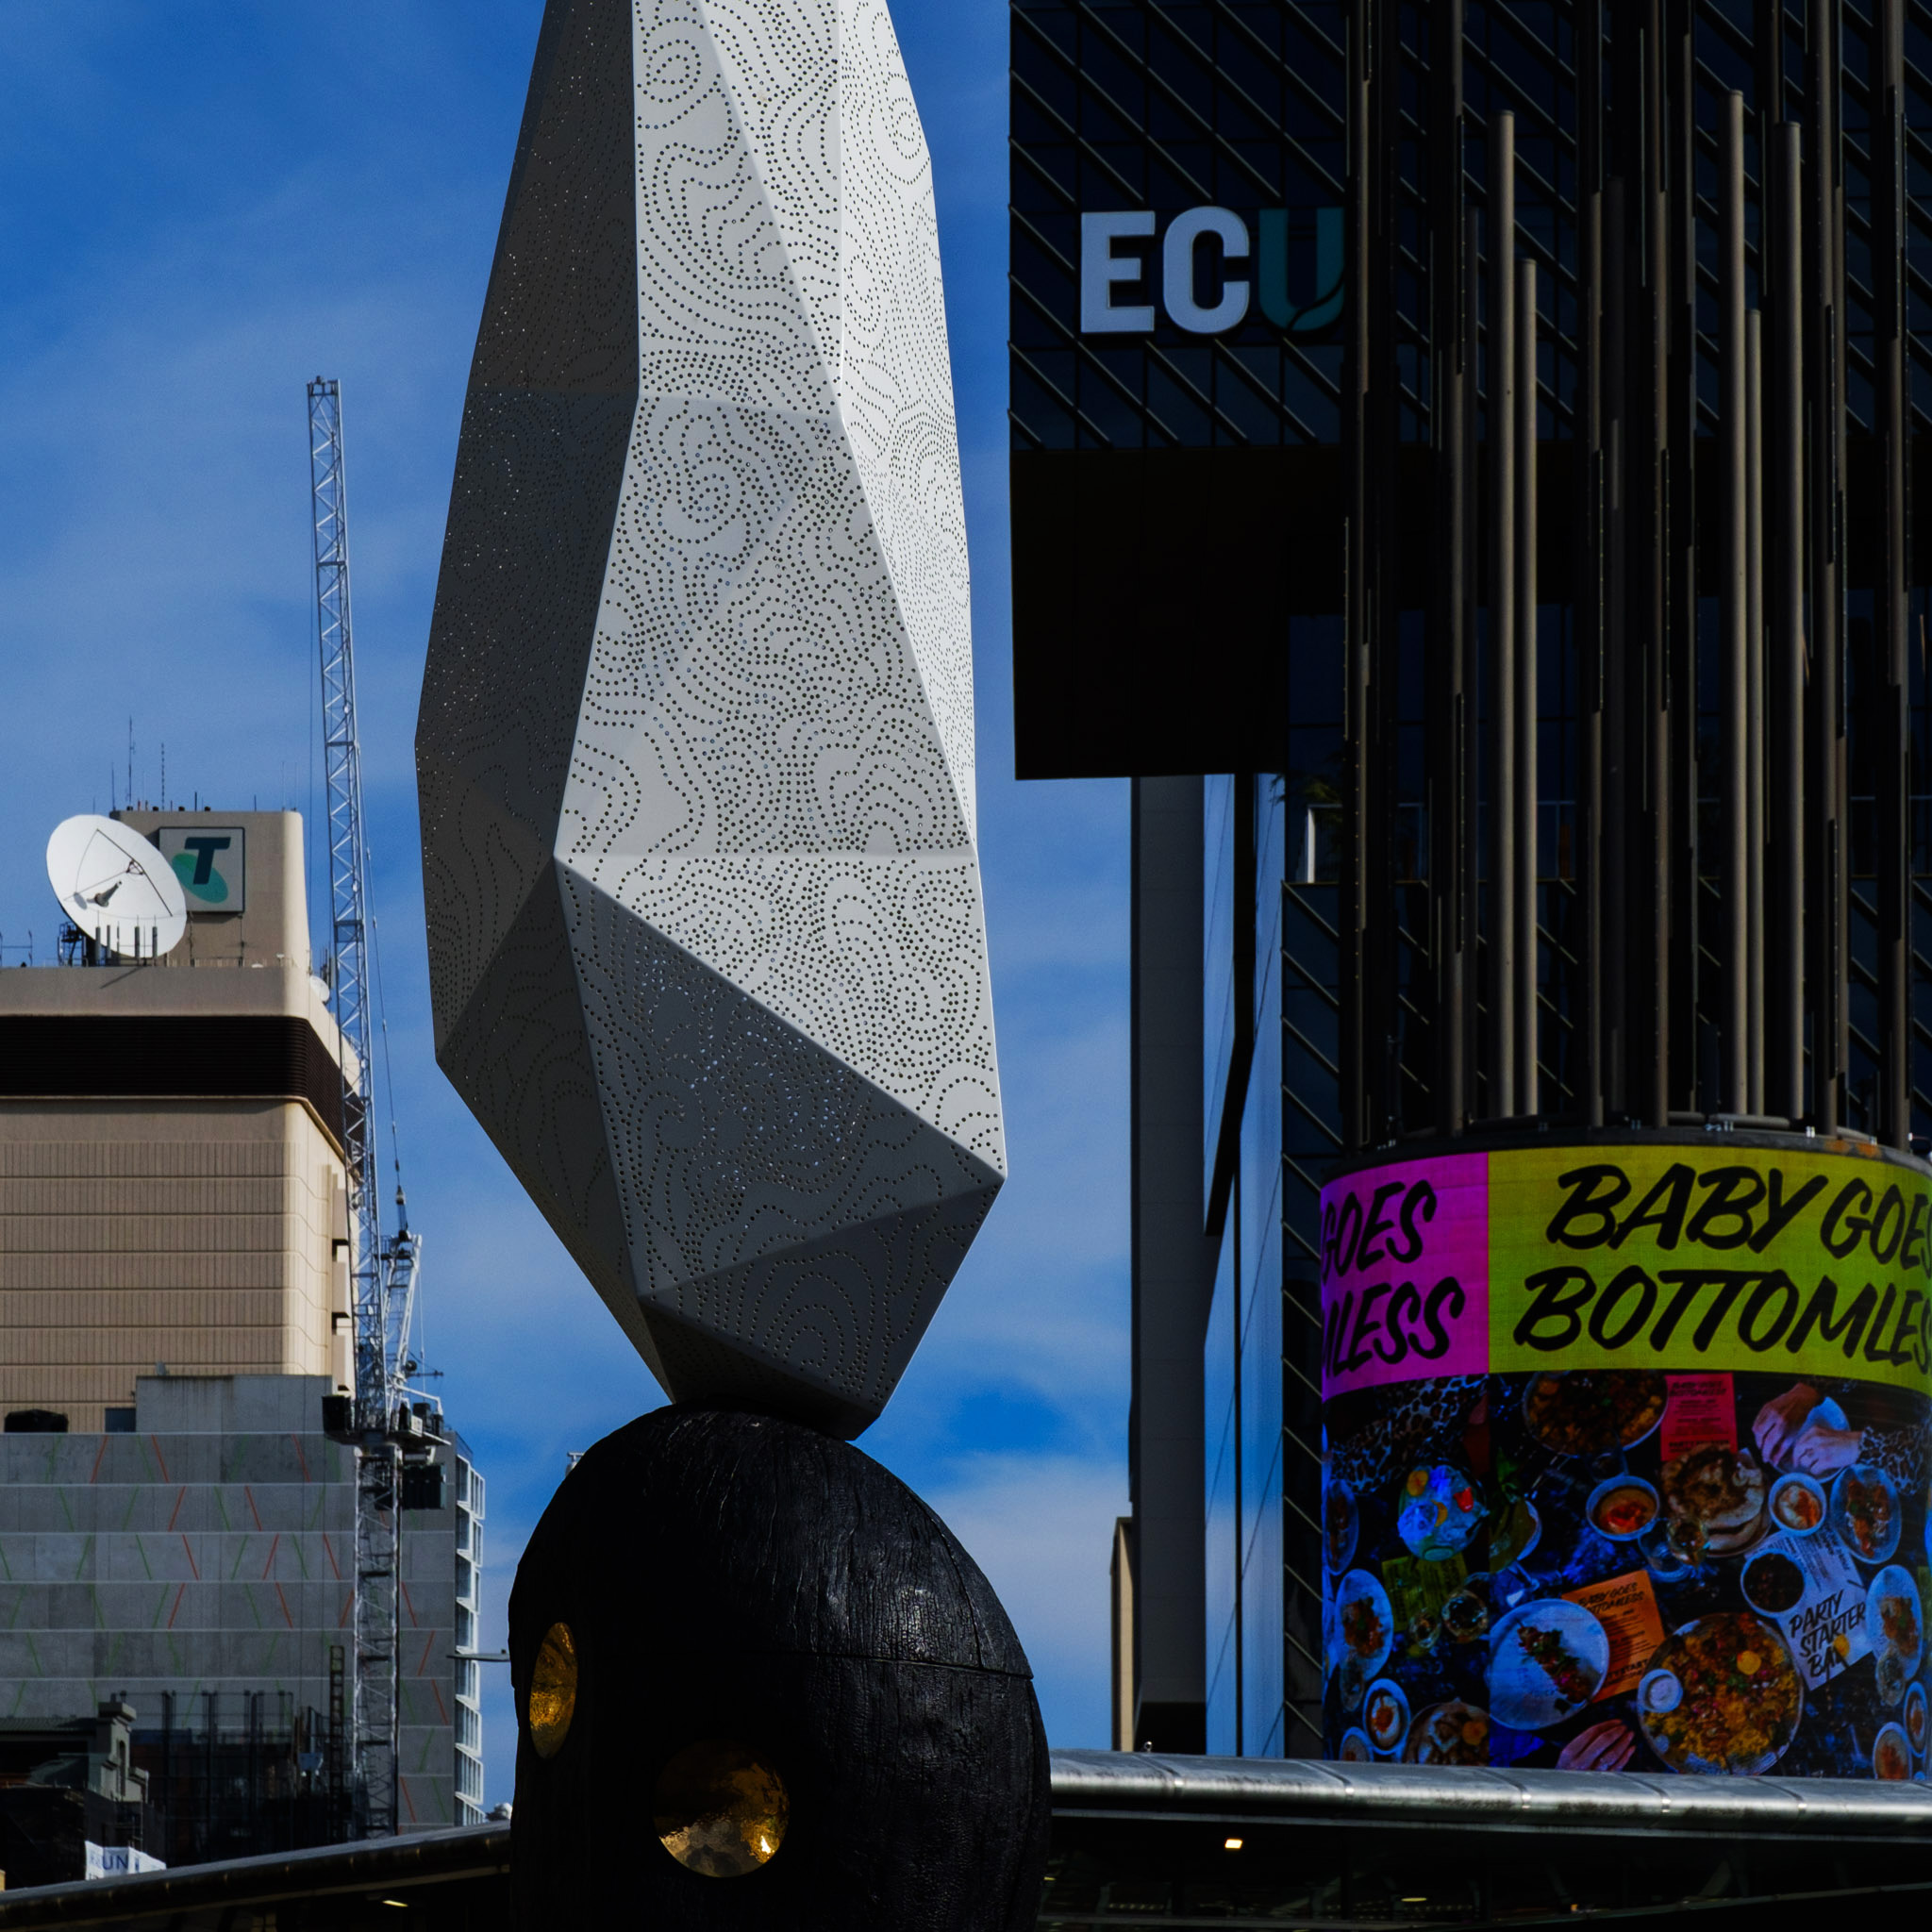
The example above presents a busier composition, with many elements competing for attention. But because the face of the sculpture lit by the light is the brightest part of the image, it serves as the visual anchor in the composition. The blocks of structures (darker than the anchor) help frame it and draw attention to it.
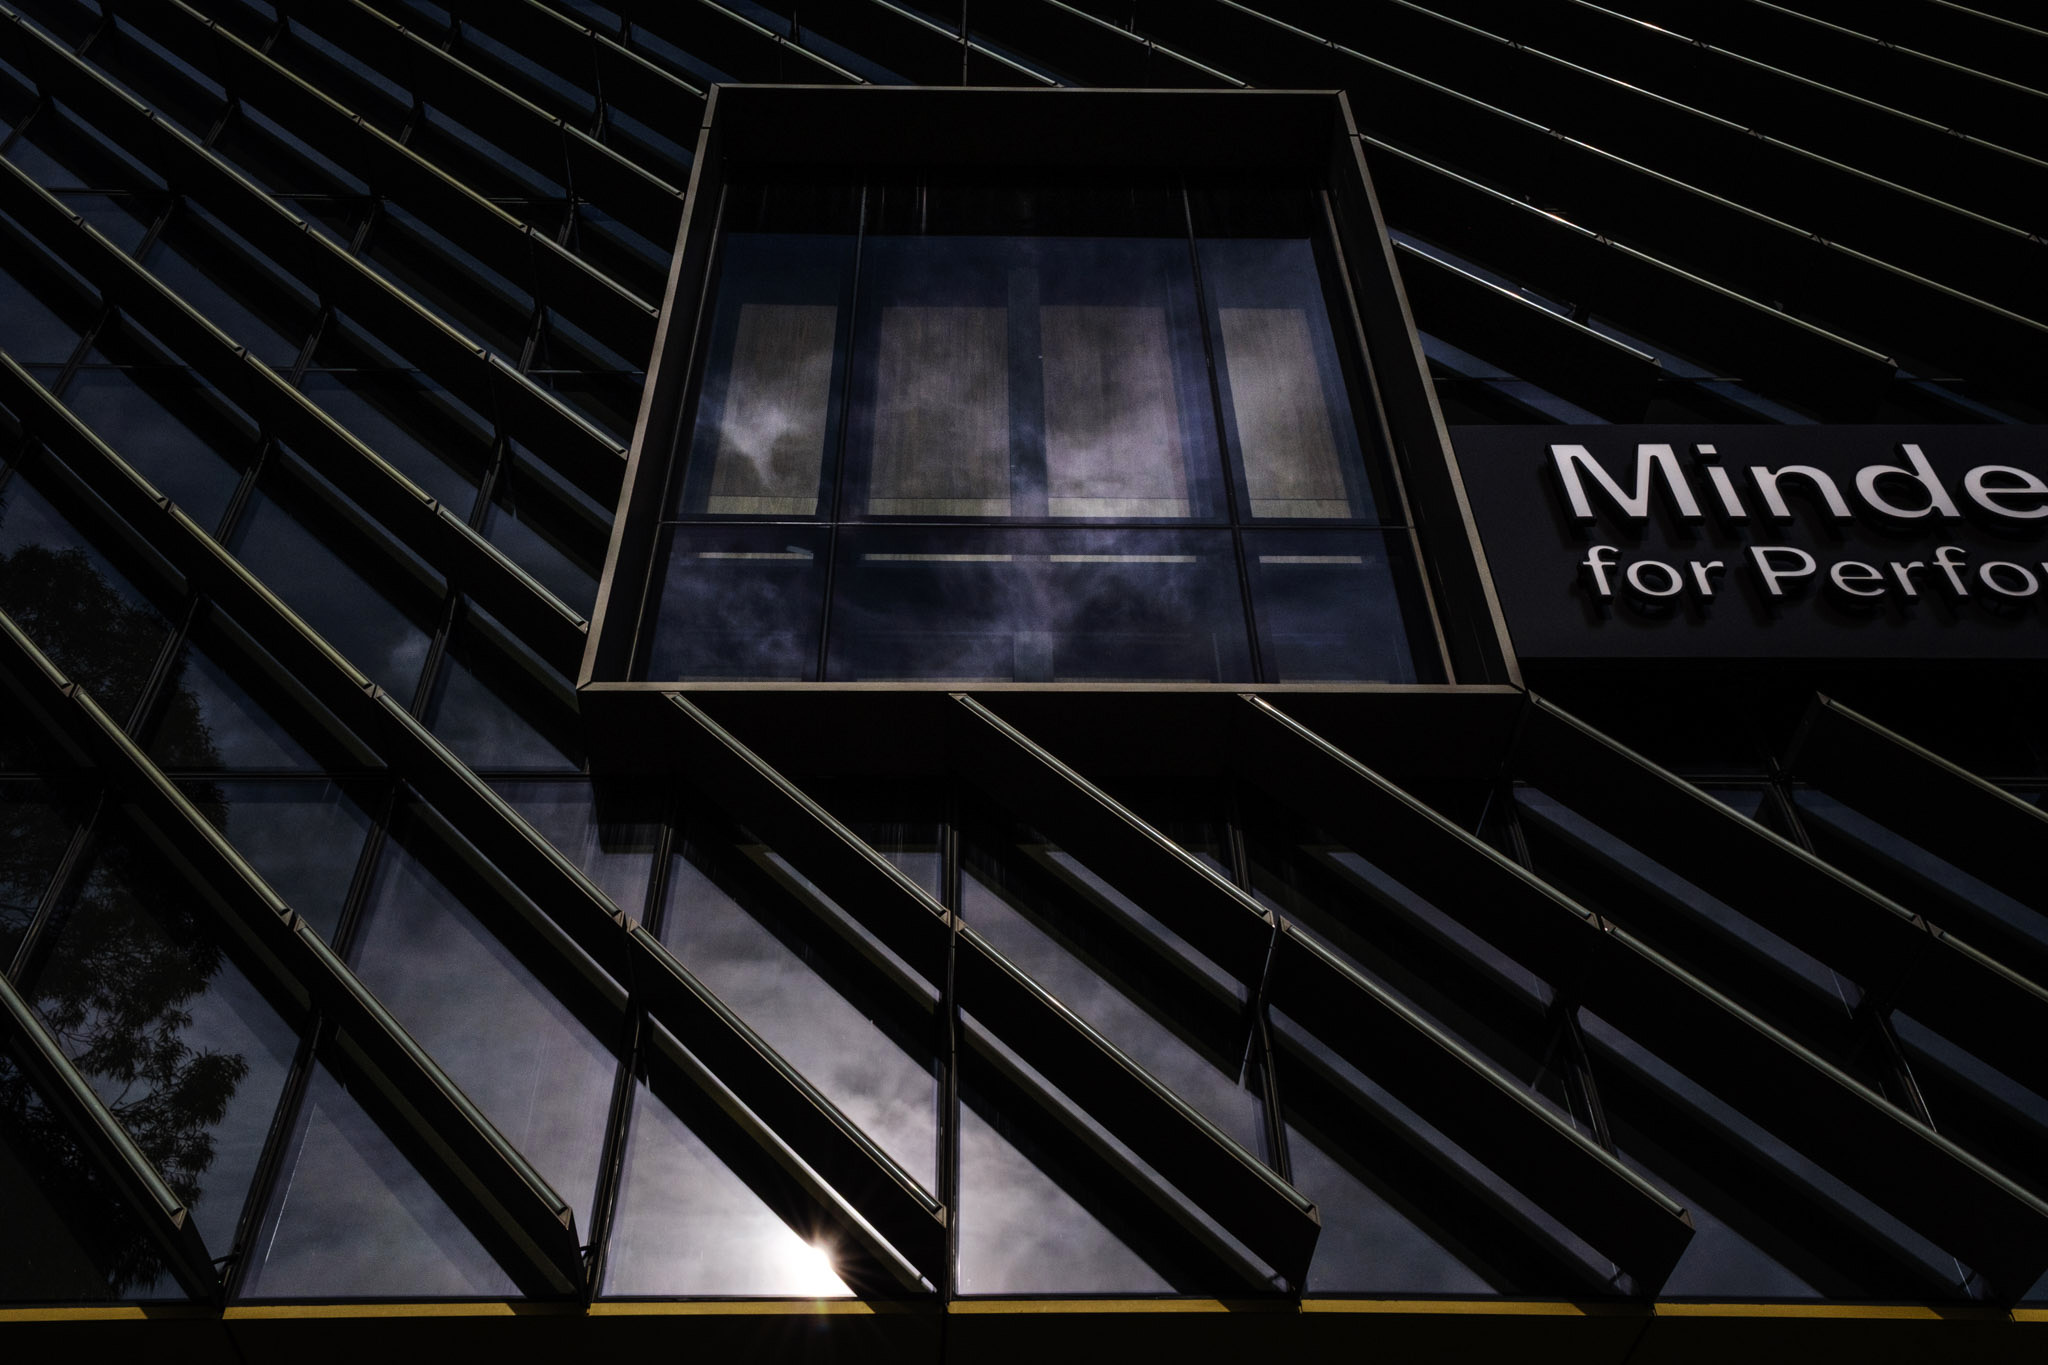
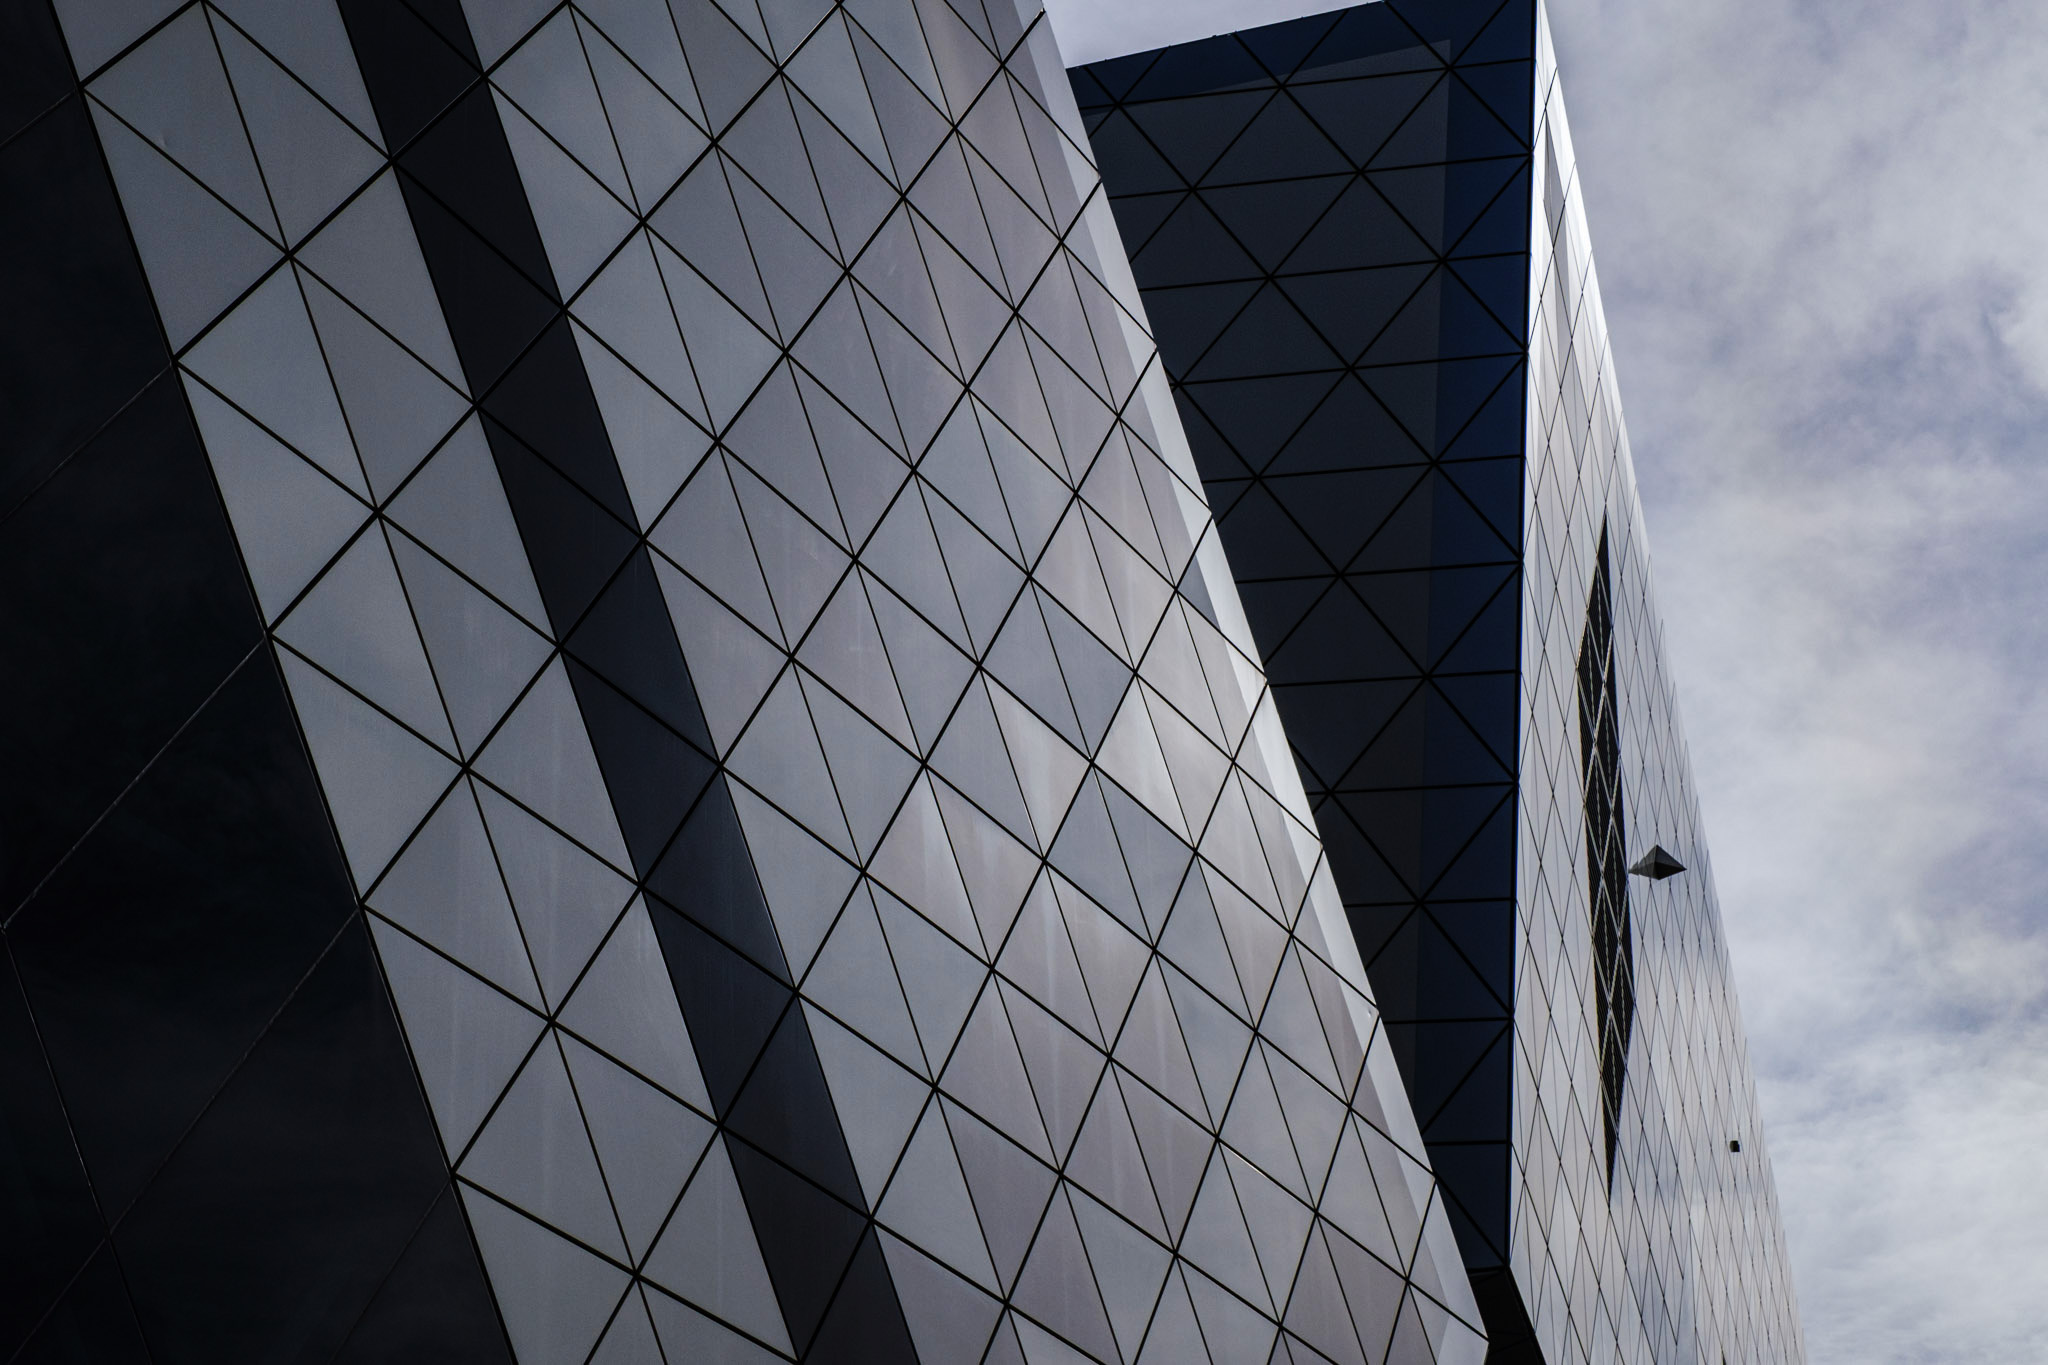
The two images above show how light, lines and composition work together to create the image. The first may appear to be quite a complex composition — there seems to be a confluence of converging and diverging lines, partial text, reflection and light. But the central placement of the window anchors the frame, and the partial text adds a cheeky element to off-balance the balanced composition. In the second image, the composition is simpler, an interplay of diagonal and vertical lines that take the eye on an up and down zigzag pattern through the frame. Both these images were underexposed in order to heighten the drama by exposing for highlights and allowing the shadows to fall very dark, creating negative space that helps direct the gaze.
Walking around an urban environment with a camera feels a bit like “hunting”… you’re looking for interesting convergences of light, lines, shape and form, and then working out how best to frame them to create an image with impact.
The next time you’re wandering through city streets, photograph the light that falls upon them. Look for the interplay between between lit shapes and surfaces, and shadow. When you begin seeing light as your subject, the city transforms into an endless gallery of abstract compositions waiting for you to find them.
No Comments